User Guide
Overview
Introduction
Super Interactive Maps
Easily Create Interactive Maps for Your WordPress Website
By: Joe Iz
Demo Link: https://superstorefinder.net/superinteractivemaps/
Video: https://www.youtube.com/watch?v=iN9H0_ZlLtg
Support: http://superstorefinder.net/support
Super Interactive Maps is a fully-featured WordPress Plugin integrated with Google Geochart that allows you to create a map of country, content and regions as well as add interactivity such as map markers, interactive pop up (video/text/images), colored regions/markers and many other cool features.
This is a responsive plugin and fully compatible with the latest WordPress version (v4.4.2) and Visual Composer.
Installation
FTP Installation
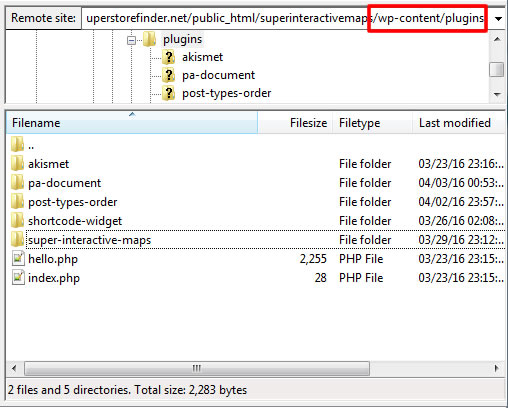
1. Using a FTP program, upload the plugin folder super-interactive-maps located in
your plugin download package folder.
2. Go to Plugins screen find the newly uploaded Super Interactive Maps Wordpress plugin
in the list.
3. Click Activate Plugin to activate it.
WordPress Installation
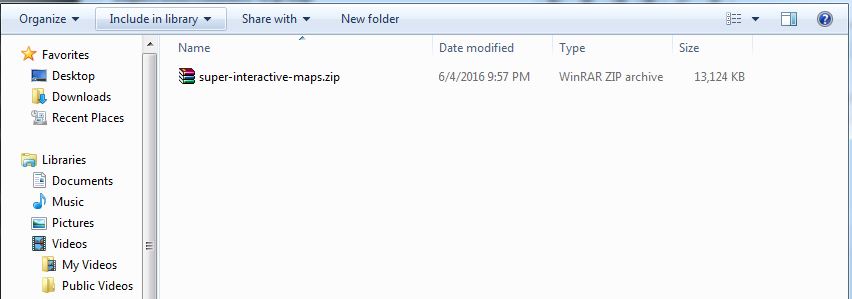
Firstly, extract (Unzip) the plugin download package. Within the download package
you’ll find the following file structure and contents:
super-interactive-maps.zip
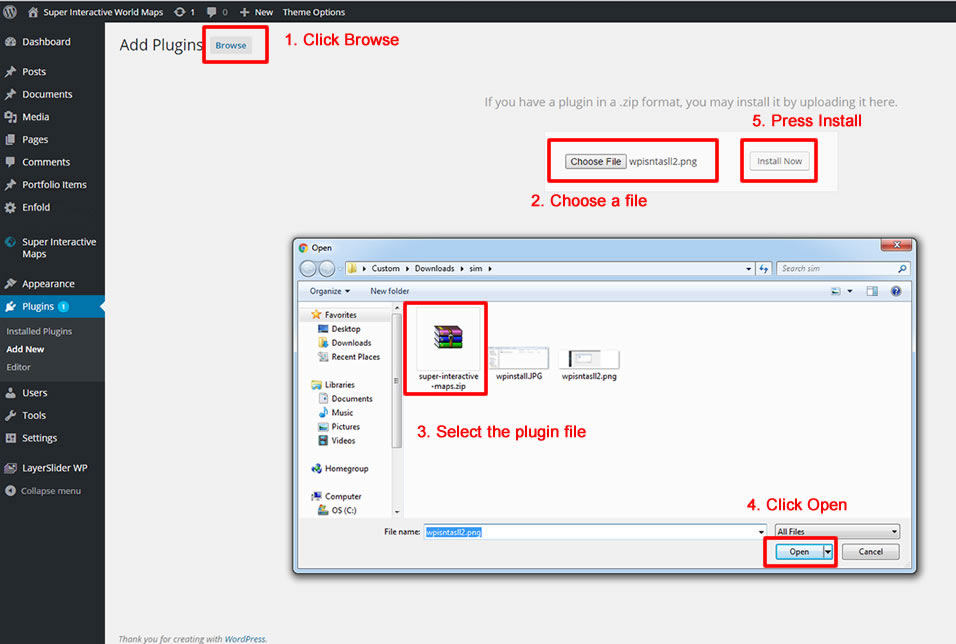
1. Go to Plugins > Add New
2. Under Upload, click Browse, locate super-interactive-maps.zip in your plugin
download package and click Open.
3. Find the WordPress Plugin you wish to install.
4. Click Install Now to install the WordPress Plugin.
5. A popup window will ask you to confirm your wish to install the Plugin.
6. If this is the first time you’ve installed a WordPress Plugin, you may need
to enter the FTP login credential information. If you’ve installed a Plugin
before, it will still have the login information. This information is available
through your web server host.
7. Click Proceed to continue with the installation. The resulting installation
screen will list the installation as successful or note any problems during
the install.
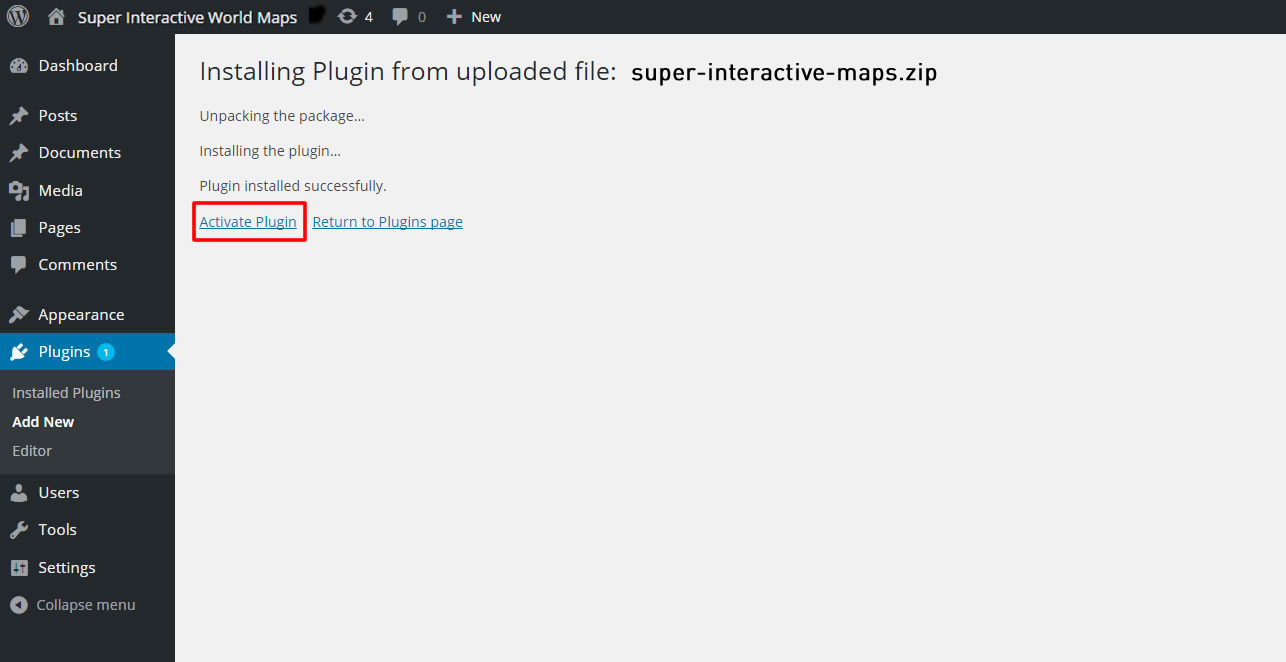
8. If successful, click Activate Plugin to activate it.
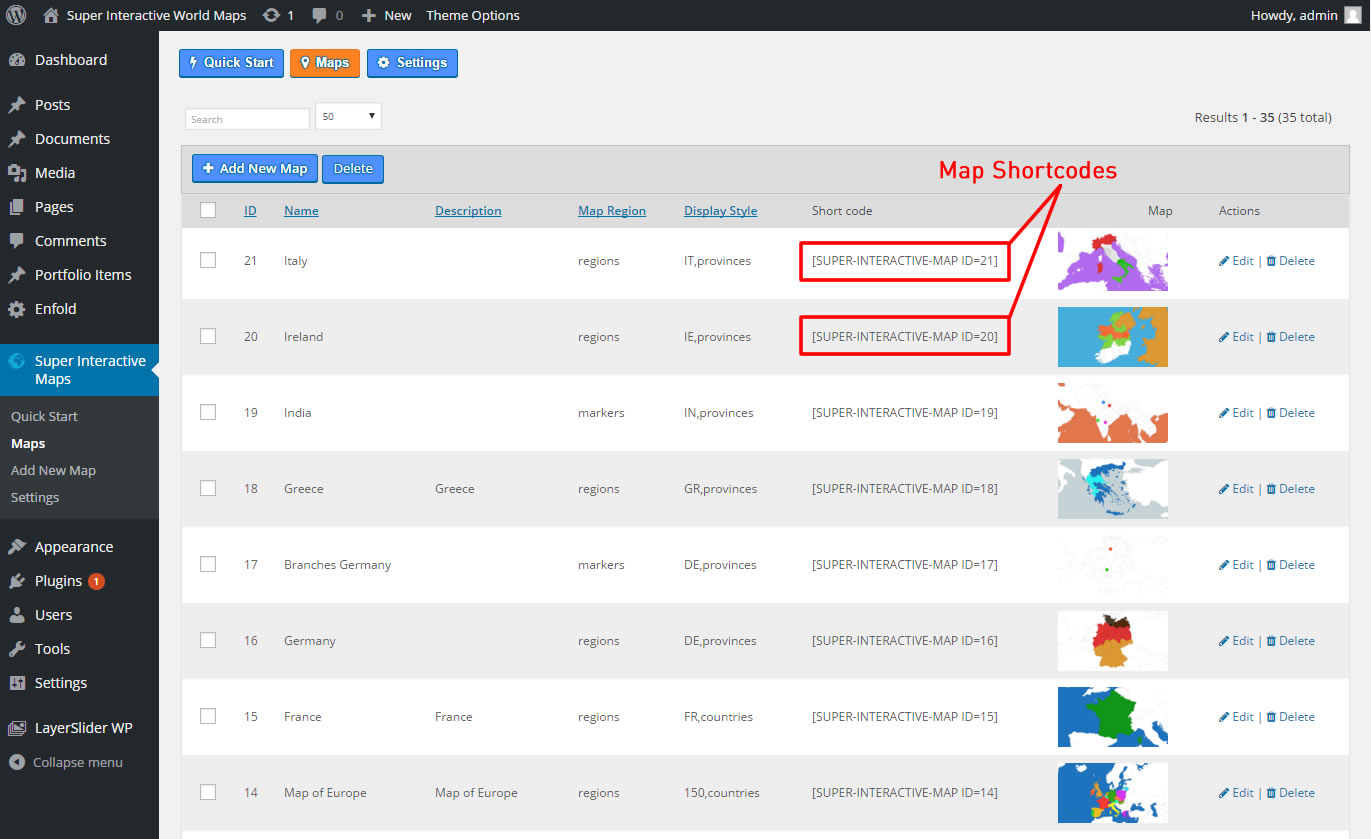
Quick Start
Using Shortcodes
You can use and paste the shortcodes on any WordPress Page, Post or Widgets.
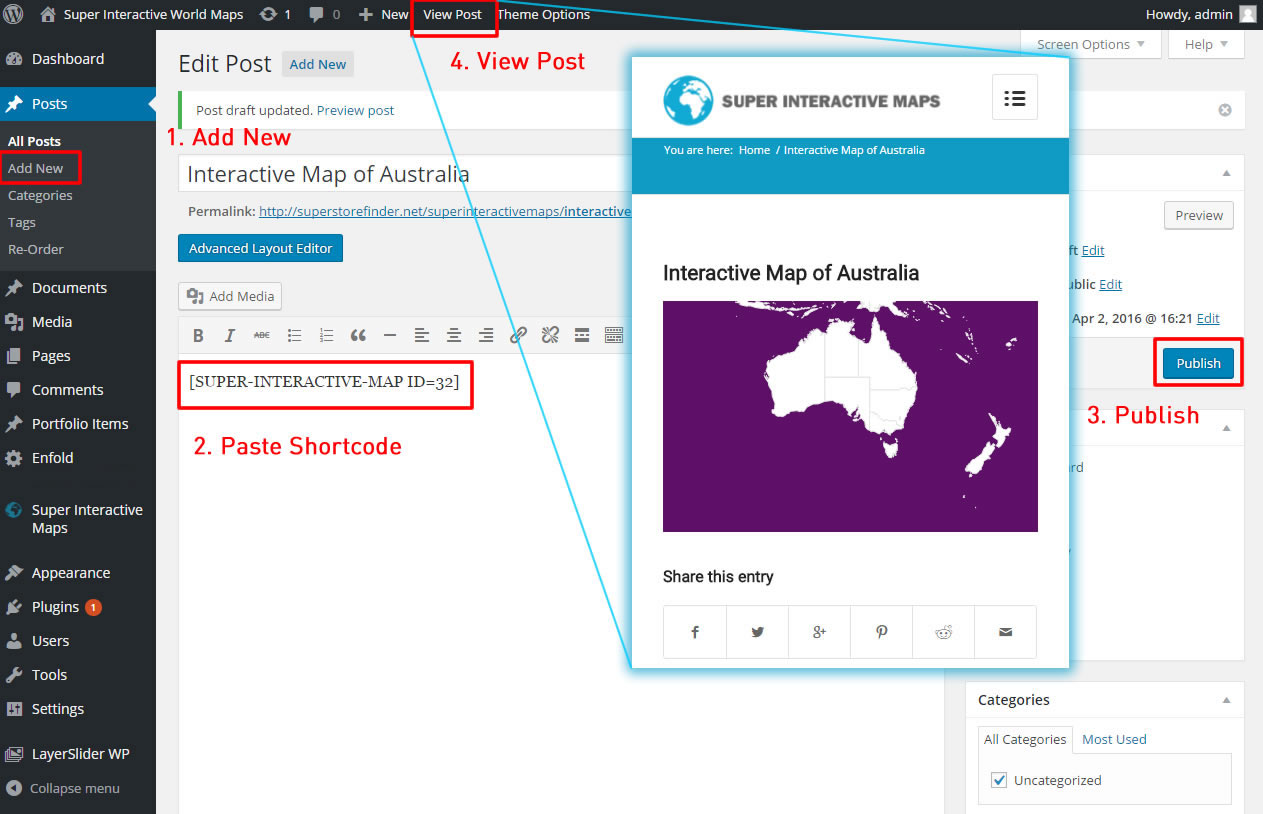
Map on WordPress Post
To add at WordPress posts, use the steps below
1. First, click on Posts > Add New
2. Paste the shortcode and click Publish
3. Click on View Page to view your interactive map
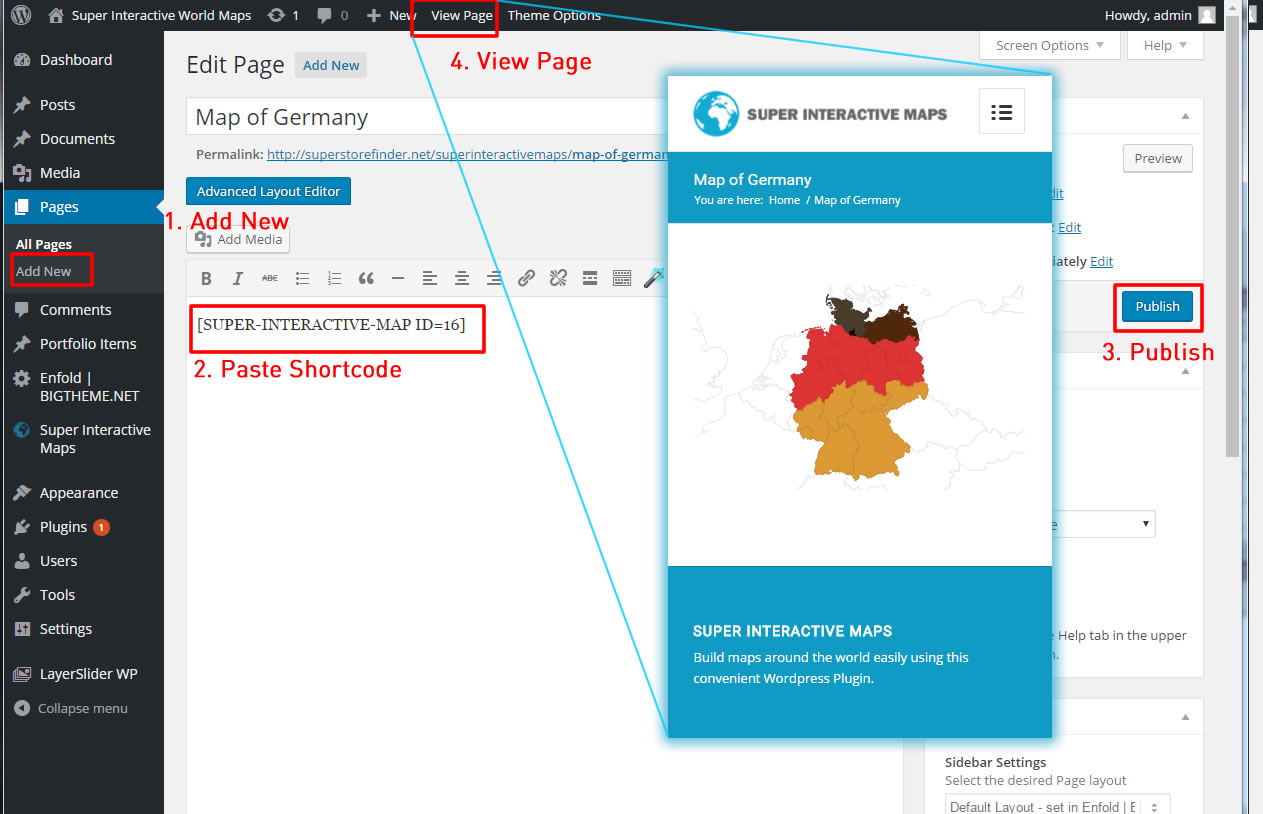
Map on WordPress Page
To add at WordPress pages, use the steps below
1. First, click on Pages > Add New
2. Paste the shortcode and click Publish
3. Click on View Page to view your interactive map
Map on WordPress Widgets
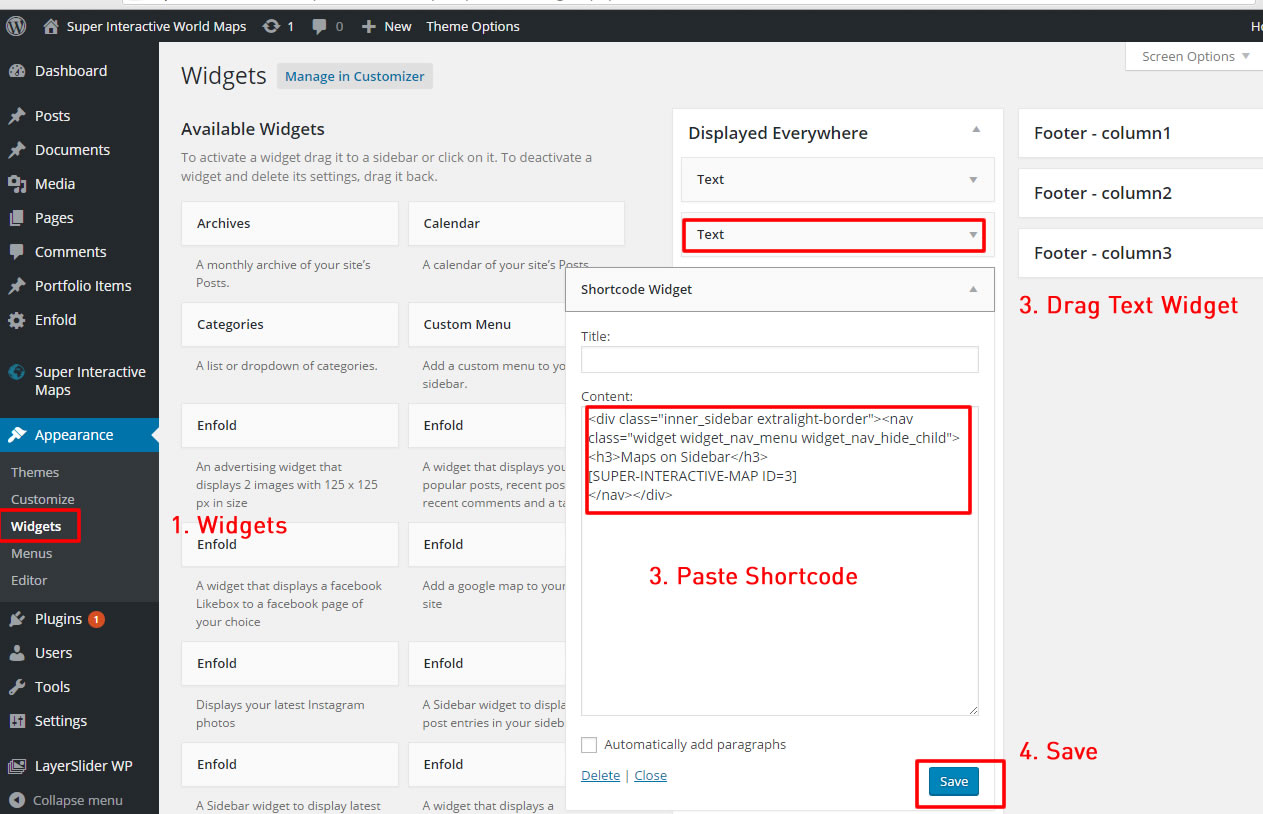
To add at WordPress widget, use the steps below
1. First, click on Appearance > Widgets
2. Drag the Text widget to any location i.e Sidebar
3. Open the Text and paste the shortcode and press Save
4. View your website to view interactive map (Sidebar in this example)

Maps
Adding a Map
* You can view the full 500+ supported list of countries and provinces from the list below (Supported by Google GeoChart API):
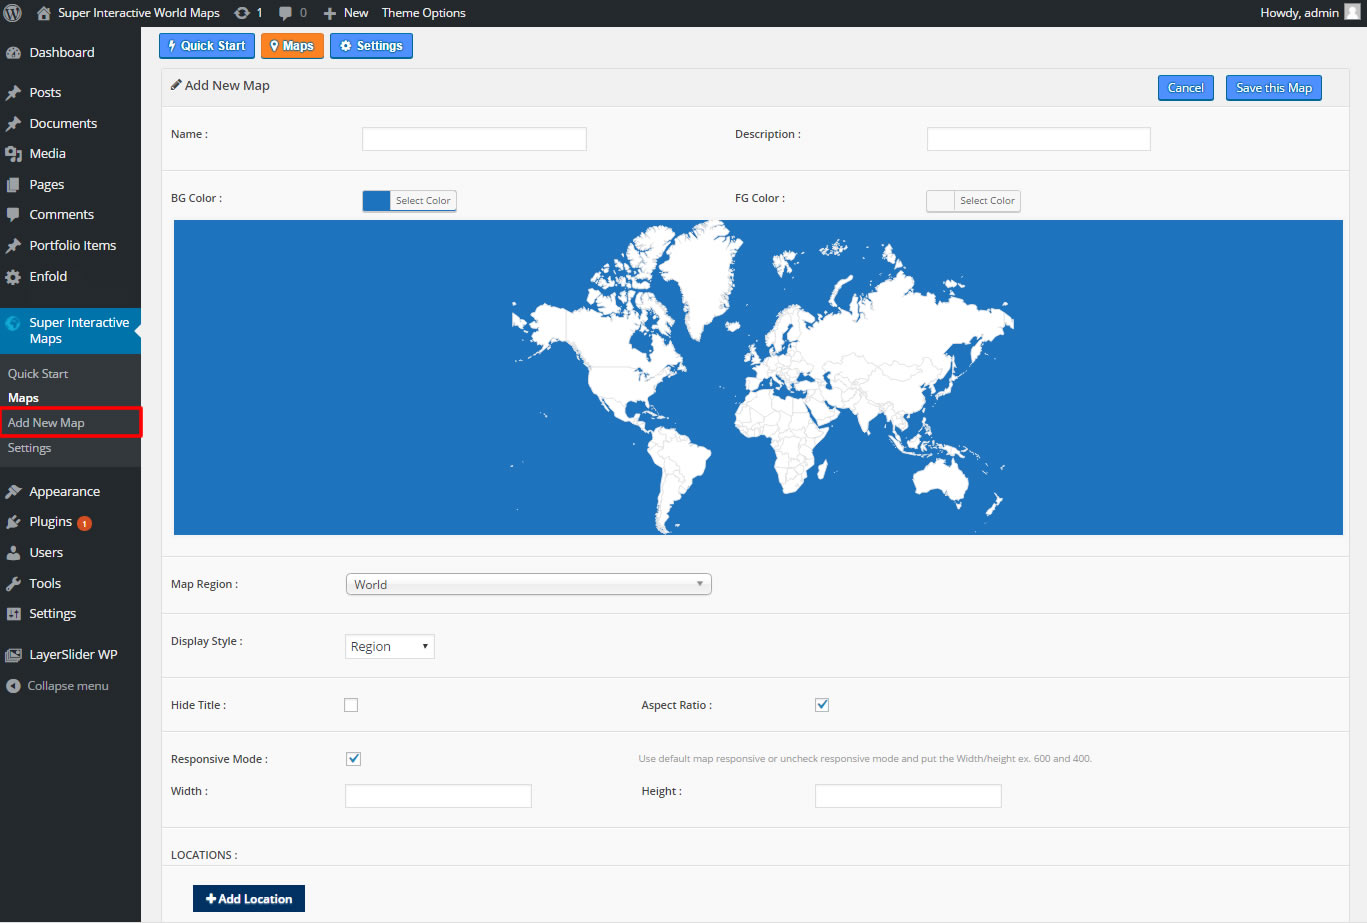
1. Firstly, click on Add New Map
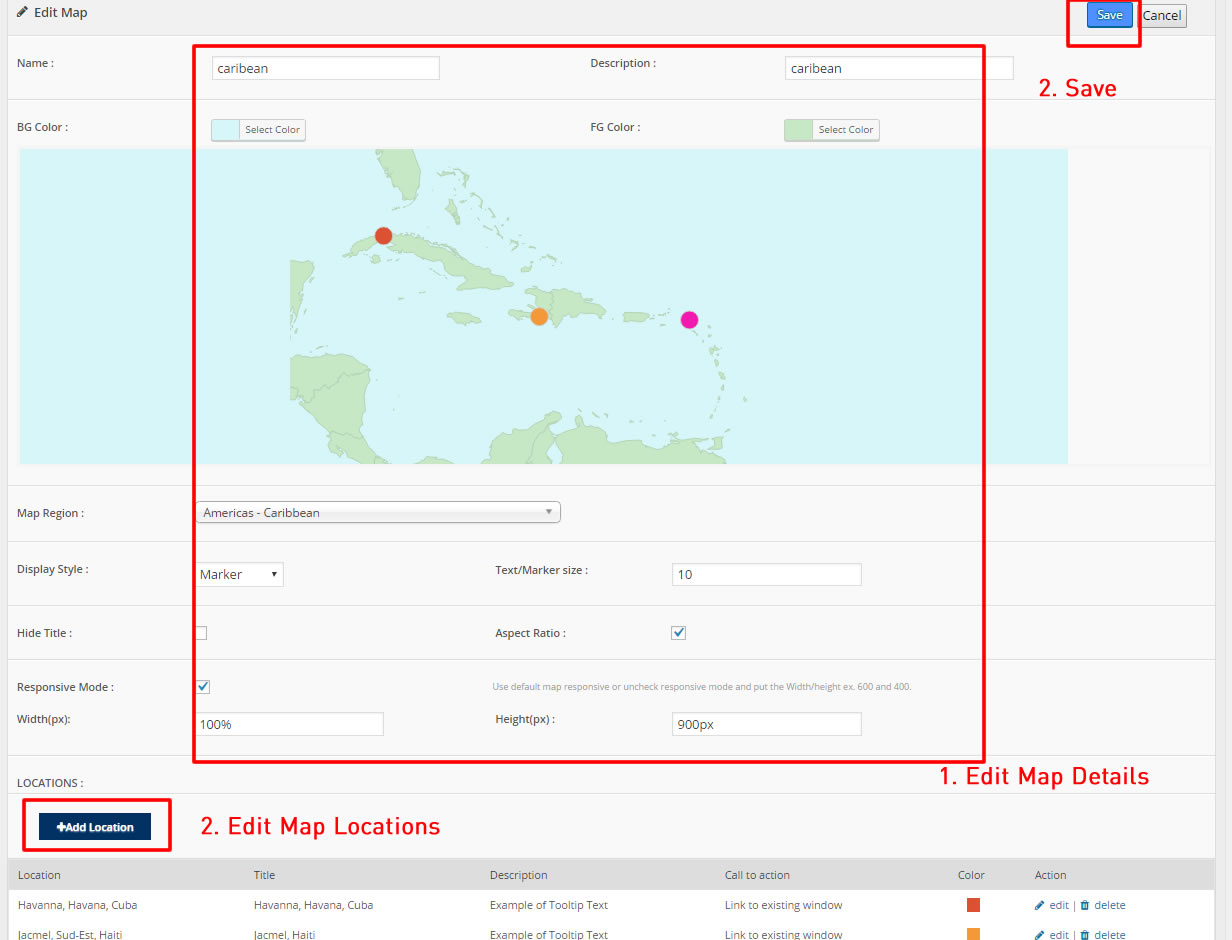
2. Enter Map Details such as Name, Description, etc. Changing the map settings such as background color, regions, display styles and adding location will change the map preview area real time.
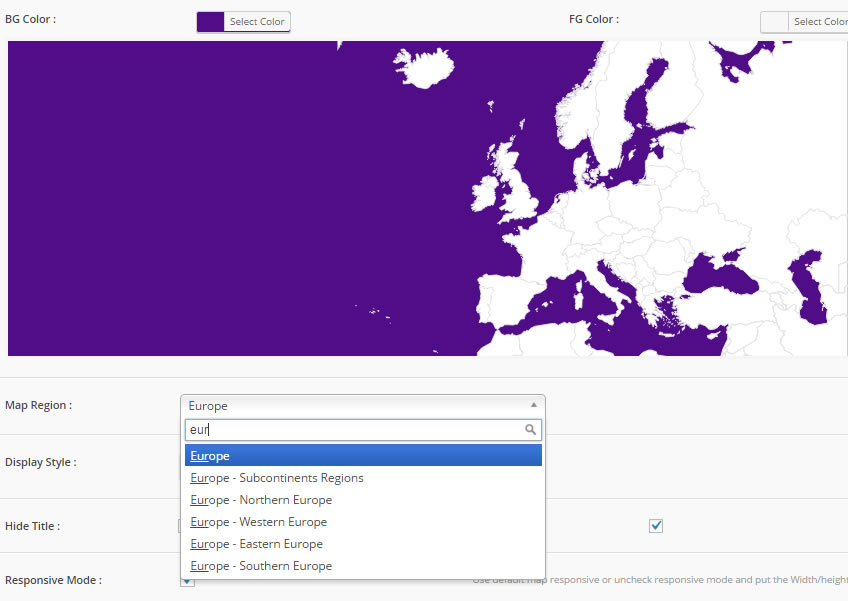
3. You can easily search the map regions using the auto complete search.
* There are 3 types of map display style that you can choose from
a. Regions
b. Markers
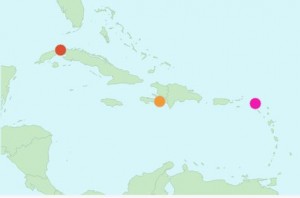
c. Text Labels
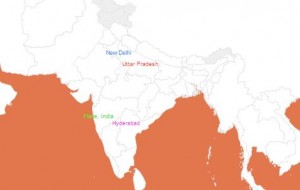
4. Once you’ve decided on the display style (you can only choose one as per Google GeoChart API), click on Add Location to start adding location
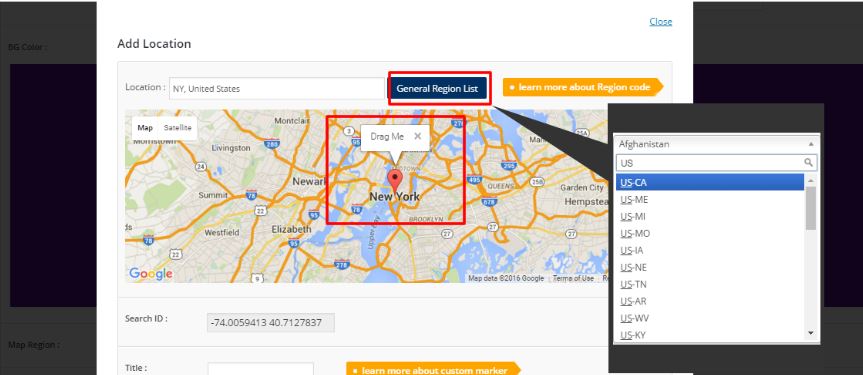
5. For the Location field, you can search for any location around the world (using Google Maps autocomplete search) and drag and drop the map marker to pin point to the exact location you want to display on the map. In addition, you can choose from a general list of countries and regions around the world.
If you select (a) Region as your Display Style, follow instructions below:
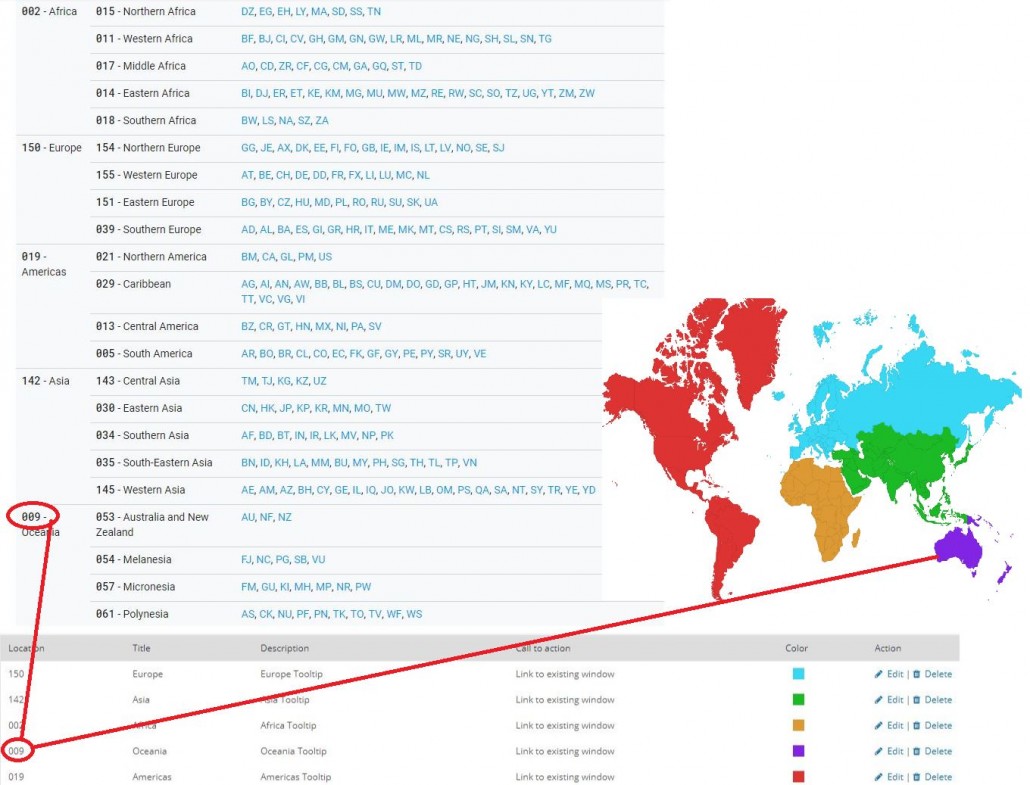
* Region codes for each continent is available here.
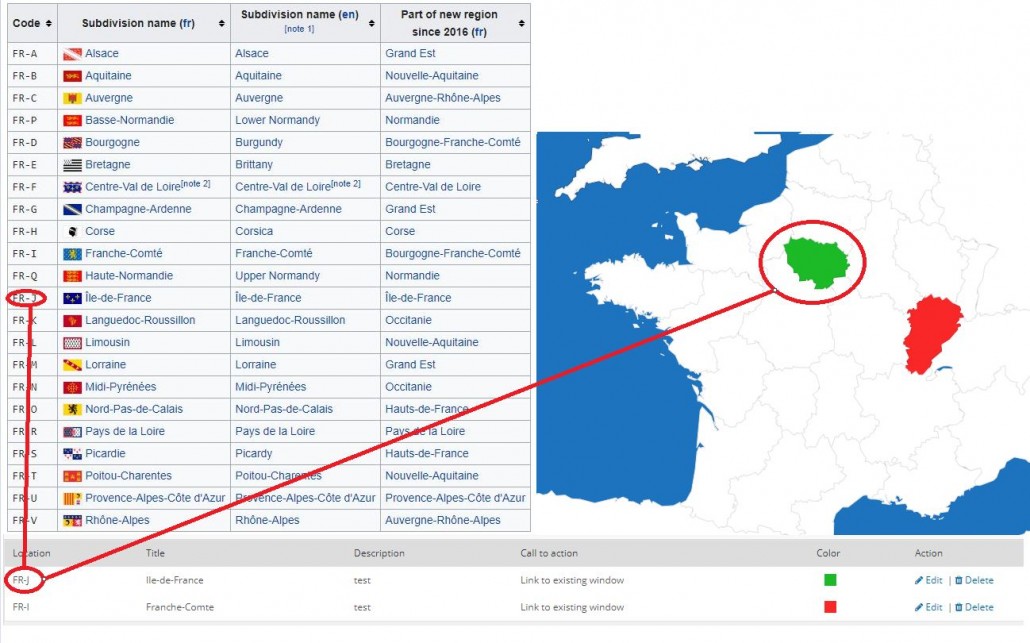
Region codes for each country provinces is available here.
For example, France provinces region codes are available here.
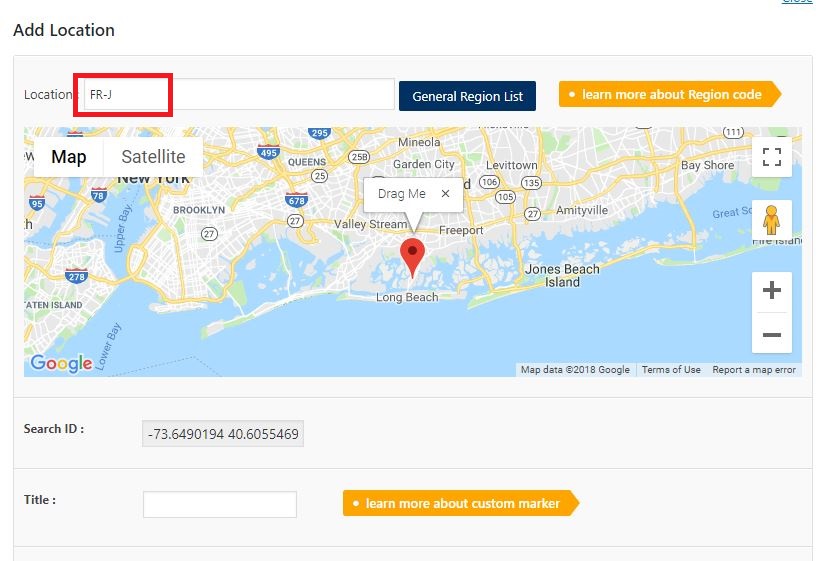
* Important notice: Make sure to enter region code exactly as it is in the Location field (ignore the Google autocomplete)
* If you wish to add Metropolitan Areas, you can refer to this article here on how to get DMA Metropolitan Codes.
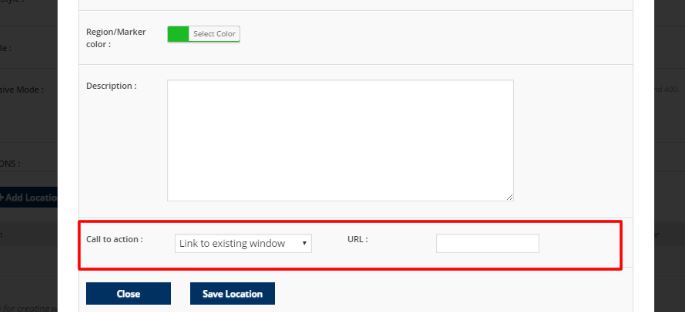
6. You’re able to choose a specific Call to Action for each location.
a. Link to existing window – Link to a url in the same window
b. Link to a new window – Link to a url in a new window
c. Pop up information – Responsive Pop up that allows you to display rich content such as text, video, images.
(Learn how to embed videos, add images and text to your pop-up window)

d. Link to Super Store Finder – Link to a specific location on Super Store Finder store locator product (more info)
7. Once done, press Save location to add a location for your map and it will be displayed at the map previewer.
8. If you would like to save the overall map, click on Save this Map and you can use the shortcode and display it on your website (refer to this step)
Editing a Map
1. Firstly, click on Maps
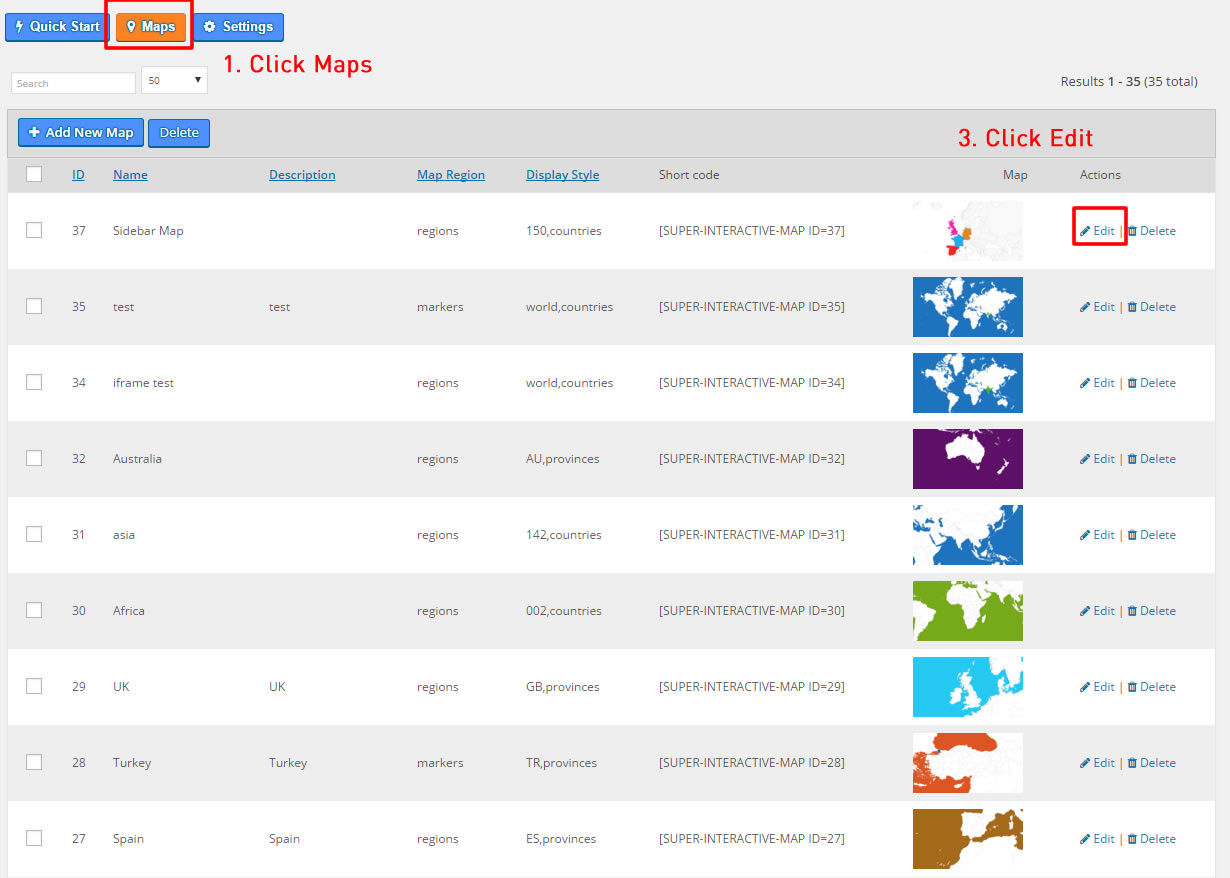
2. Click on the Edit Icon for a particular map
3. Edit the Map details (refer more details in Adding a Map)
4. Click on Save
Deleting Maps
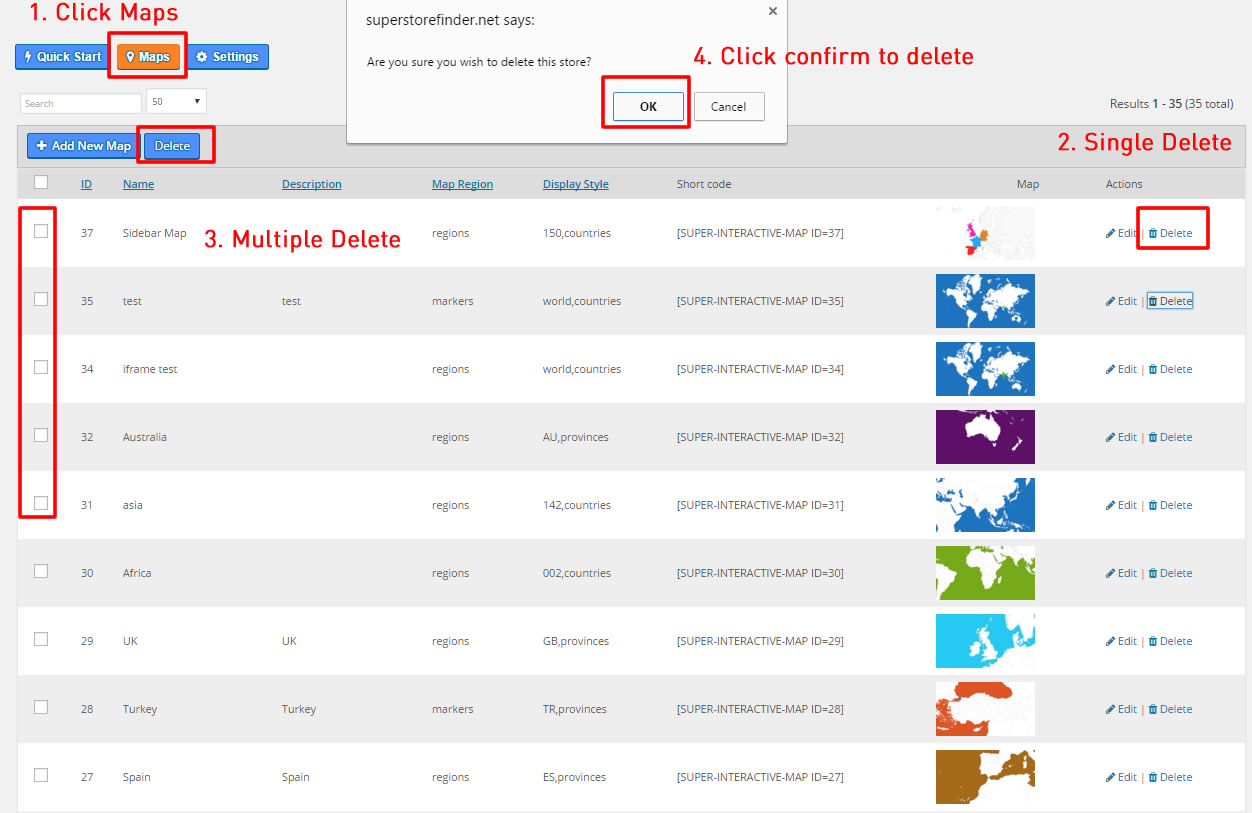
1. Firstly, click on Maps
2. To delete single map, click on the Delete Icon
3. To delete multiple maps, select stores from the checkboxes and click on the Delete button
4. Click OK to confirm deletion
Zoom In/Out and Pan Map
Some map regions are not available in Google GeoChart API yet, however, you can create custom cropped map by using instructions below:
1. Create a New Map
2. You can use the controls on the top left of the Map Previewer (i.e Zoom In/Out, Pan and adjust height)
Settings
Configuring Settings
1. Click on Settings
2. Change the default settings when creating maps such as Background, Map, Region/Marker colors, marker size, width, height and aspect ratio.
3. Click on Save Settings

Support
Support, Knowledge Base and Forums
We provide fast and reliable support, for inquiry, troubleshooting, customization and special requests, please send an email via the contact form at https://codecanyon.net/user/highwarden
Be sure to follow us on Envato for new releases and future products here.
For knowledge base and forums you can visit the following links:
You can also follow us on social media sites
