SELECT LAYOUT Standard Layout Left Layout Right Layout CUSTOMIZABLE STYLES You can customize your store locator look and feel to suit your website design. Learn more
RECOMMENDED WITH ITEM
Marker Clusterer Add-On for Wordpress Multi Category Add-On for Wordpress Distance Radius Add-On for Wordpress Reviews & Ratings Add-On for Wordpress Custom Category Markers Add-on for Wordpress Super Product Variation Swatches for WooCommerce Super Interactive Maps Super Store Finder Google Reviews & Ratings
OTHER PRODUCTS
Super Store Finder - Custom Markers Add-on - CodeCanyon Item for Sale Super Store Finder - Exact Geo Location Add-on - CodeCanyon Item for Sale Super Store Finder - Multi Categories Add-on - CodeCanyon Item for Sale Super Store Finder - Marker Clusterer Add-on - CodeCanyon Item for Sale Mega Locator Theme - Super Store Finder Super Store Finder - Compact Theme - CodeCanyon Item for Sale Super Store Finder for Wordpress Super Store Finder
Select Language

Overview

Installation

WordPress Installation

Firstly, extract (Unzip) the plugin download package. Within the download package
you’ll find the following file structure and contents:

superstorefinder-wp.zip

install1

1. Go to Plugins > Add New

2. Under Upload, click Browse, locate superstorefinder-wp.zip in your plugin
download package and click Open.

3. Find the WordPress Plugin you wish to install.

4. Click Install Now to install the WordPress Plugin.

install5

5. A popup window will ask you to confirm your wish to install the Plugin.

6. If this is the first time you’ve installed a WordPress Plugin, you may need
to enter the FTP login credential information. If you’ve installed a Plugin
before, it will still have the login information. This information is available
through your web server host.

7. Click Proceed to continue with the installation. The resulting installation
screen will list the installation as successful or note any problems during
the install.

8. If successful, click Activate Plugin to activate it.

install7

Back To Top

FTP Installation

1. Using a FTP program, upload the plugin folder superstorefinder-wp located in
your plugin download package folder.

2. Go to Plugins screen find the newly uploaded Super Store Finder WordPress plugin
in the list.

3. Click Activate Plugin to activate it.

install2

Back To Top

Quick Start

Using Shortcodes

You can use and paste the shortcode on any WordPress Page or Post.

To add at WordPress pages, use the steps below

1. First, click on Pages > Add New

2. Paste the shortcode and click Publish

3. Click on View Page to view your store locator

quickstart2

To add at WordPress posts, use the steps below

1. First, click on Posts > Add New

2. Paste the shortcode and click Publish

3. Click on View Page to view your store locator

quickstart3

You can refer to the knowledge base articles links here on how to publish the shortcode in WP Bakery, Visual Composer and Elementor Page Builders. Other Page Builders should use the same method of publishing.

Back To Top

Using PHP code

1. You can edit any WordPress template and paste the following code to display Super Store Finder on that particular section of your WordPress template

quickstart4


Back To Top

The Quickstart Page

This is the landing page, refer to the following diagram which shows the navigation links and annotations.

quickstart

Back To Top

Managing Stores

Import/Export Stores

1. To import Stores, you can first click on Download Sample CSV and you can input your own list of addresses.

2. Click Import and Geo Code to proceed to import

3. Click on Export Stores to export the stores to a CSV file.

ie

Back To Top

Adding a Store

1. Firstly, click on Add a Store

2. Enter Store Details such as Name, Categories/Tags, Address, City, State, Zip, Phone, etc

3. Click on Save this Store

quickstart4

Notice: You can drag and drop the marker or enter lat and long manually

a

b
4. You can also upload beautiful images for your store locator with zoom feature included

ssf10


5. You can embed videos from YouTube, Vimeo, etc by copypasting the embed code from respective video provider

* If you’re upgrading from below patch 1.7, use these steps here.

ssf11

* You will need to  paste the embed code, example as below

ssf12

Back To Top

Editing a Store

1. Firstly, click on Stores

g1

2. Click on the Edit Icon for a particular store

3. Edit the Store Details

4. Click on Save

g1

Back To Top

Deleting a Store

1. Firstly, click on Stores

2. To delete single store, click on the Delete Icon

3. To delete multiple stores, select stores from the checkboxes and click on the Delete button

4. Click OK to confirm deletion

g1

Back To Top

Tagging / Categories

Tagging and Categorizing Stores

1. To add tag, firstly, click on Stores

2. Select multiple stores using checkboxes

3. Enter tags separated by commas

4. Click on the Add Tag button

g1

5. To remove tags, simply select multiple stores and click on Remove Tag button

Back To Top

Configuring Settings

Configuring Map Settings

Map Settings


1. Click on Settings

2. Choose Default Map Settings and click Save Settings

a. Geo Location – Will detect your visitor location and display nearby stores

b. Show All Stores – Upon loading the map, it will show all stores available

c. Show Specific Location – You will need to enter the Default Location and it will load the location upon loading the map

g1


Map Layouts


You can choose the layout of your store locator from Standard, Left and Right which can be selected via admin settings page.


layout


Standard Layout


standard


Left Layout


leftlayout


Right Layout


rightlayout

Back To Top

Custom Style Map Code

1. Create a custom Google Maps Style code or you can visit http://snazzymaps.com to get huge libraries of custom map styles

2. At the admin, go to Super Store Finder > Settings and paste it under Map Custom Code field

3. Save settings and refresh the page.

4. You’re done!

snazzy

Back To Top

Uploading Custom Markers

1. You can upload custom marker and custom marker active icons

ssf11

2. Be sure to set the show or hide labels settings to show and hide the labels on the markers (A, B, C, etc) by setting the Labeled Marker setting

label

Free Map Markers available for download here.

3. If you set Labeled Marker to Yes, to change the letter/numeric color on the map, you can use the setting below.

* You can also change the letter to numeric only by referring to this knowledge base article here.

Back To Top

Configuring Look & Feel

1. Click on Settings

2. Select Styles and Colors

3. Click on Save Settings

* Click Image for Larger View

Back To Top

Customizing Captions and Labels

1. Click on Settings

2. Customize the Labels and Captions

3. Click on Save Settings

g1

Back To Top

Manage Regions

Customizing Regions

1. You can manage regions by clicking on the Regions link


region

Back To Top

Store Finder Frontend

Using Geo Location

1. If you’ve set map settings at admin as Geo Location

2. When your customers visit the store locator, user will be prompted to allow access by Google

g1

Back To Top

Searching for Stores

1. Key in the search location and press Enter on your keyboard

g1


Back To Top

Show All Stores

1. Click on Show All link to view all stores

g1

2. From the admin webmasters can set to show all stores upon map loads (Refer to 6.1 Configuring Map Settings)


Back To Top

Get Directions

1. Click on Get Directions to view the route from one location to another and check the distance from origin to destination

g1

Back To Top

Using Category / Tags Filter

1. Click on the category/tag

2. Click on the Select button

g1

3. From the admin, go to Stores, from here you can set the categories (Refer to 5.1, tagging and categorizing stores)

Back To Top

Using Street View

1. Click on the Street View to get up close and personal to the store location that they’re planning to visit

g1

Back To Top

Using the Region Filters

1. Users can navigate to available Regions set by administrator. It’s like a shortcut to Point of Interest (POI)

g1

2. To manage regions, refer to 7.1 Customizing Regions

Back To Top

Stores Information Box

1. Available information set at admin will be shown in the info window such as Address, Email, Website, Telephone, etc

g1

2. You can set these information from 4.1 Adding Stores or 4.2 Editing Stores

3. You can add external link or enable contact form for individual stores

b1 b2

Back To Top

Add-ons

Using Add-ons for Your Store Locator

Notice: Please take note that the WordPress version of the store locator add-on item labels are in orange


as below:


Marker Clusterer Add-On for WordPress Multi Category Add-On for WordPress pixelwp pixelwp pixelwp


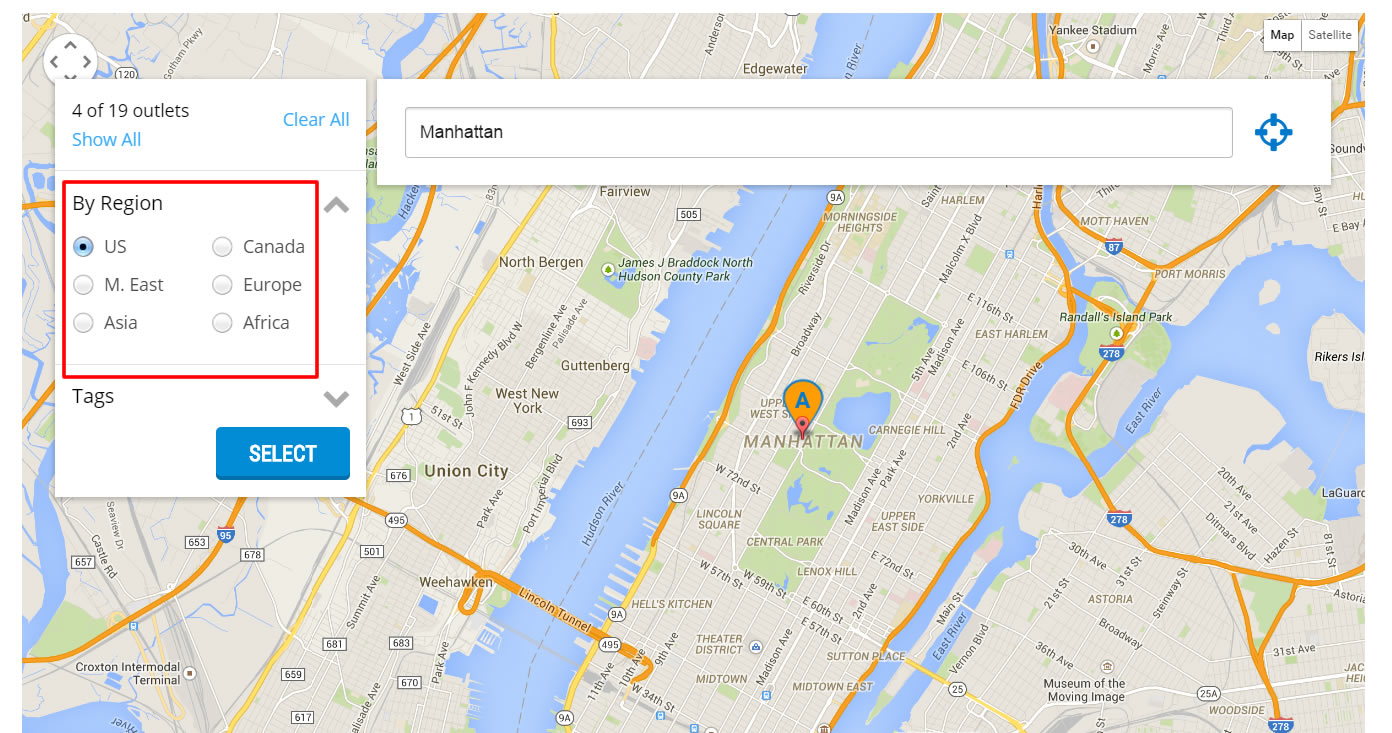
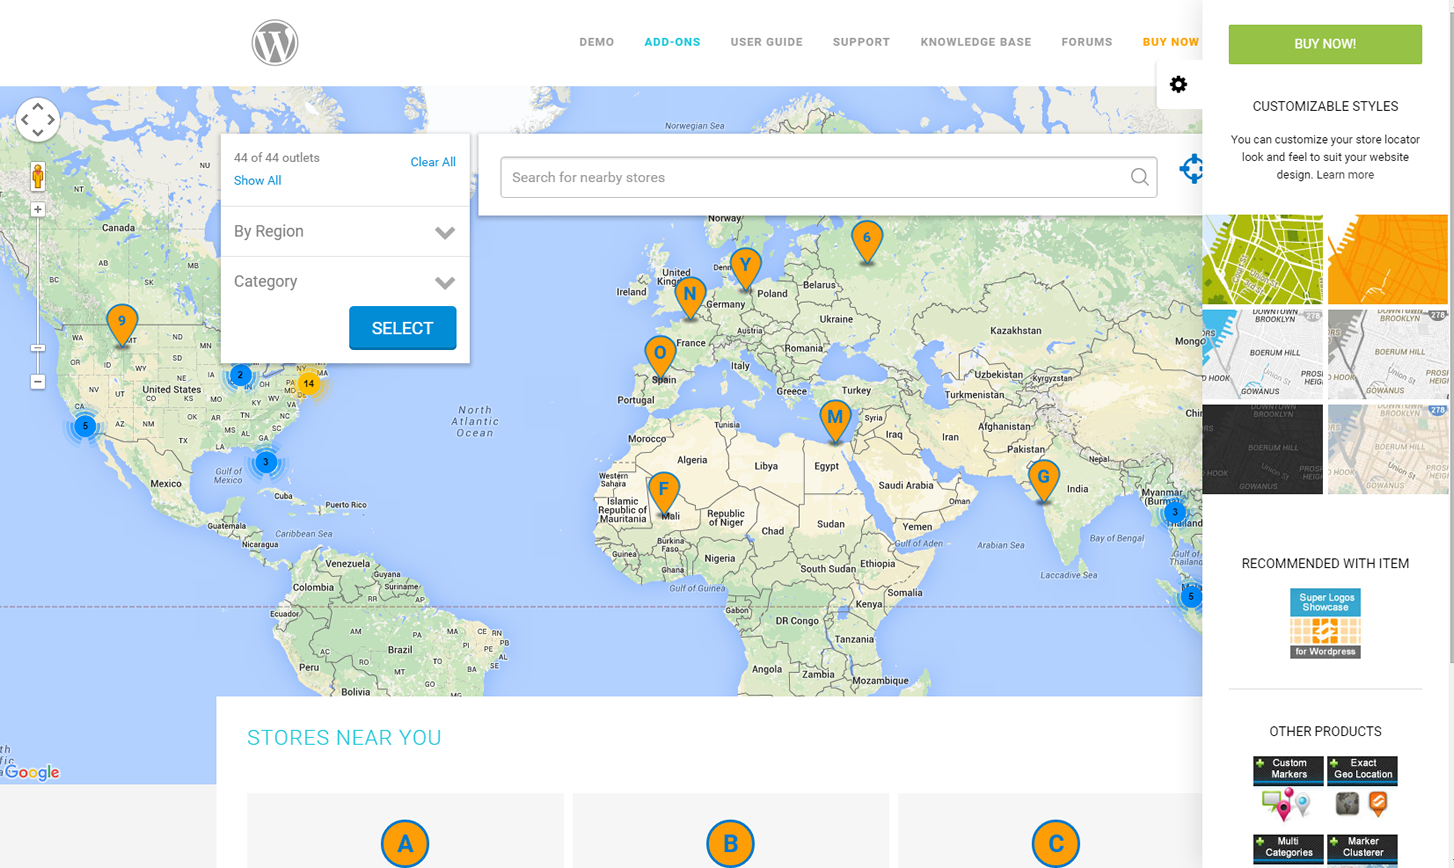
1. You are able to extend your store locator features by using add-ons.


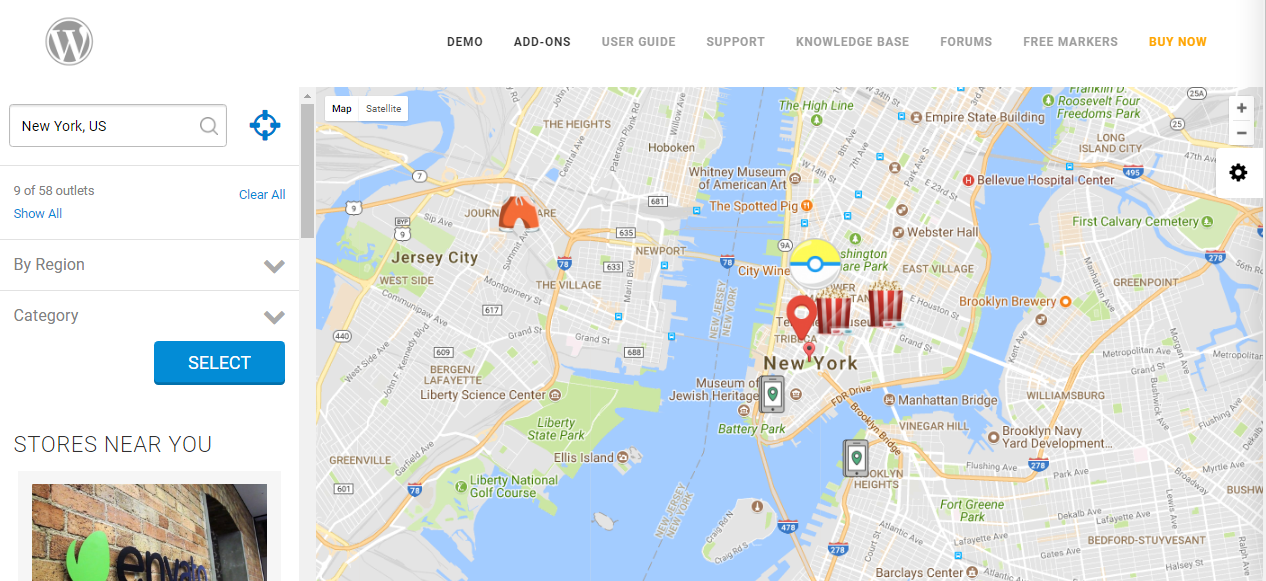
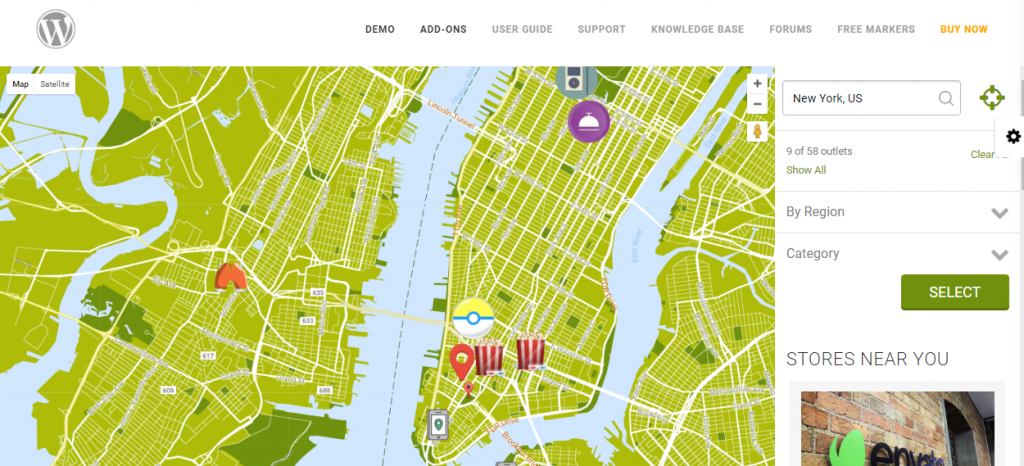
2. For instance, you can have marker clusterer and multi category features enabled for your store locator


markerclusterer


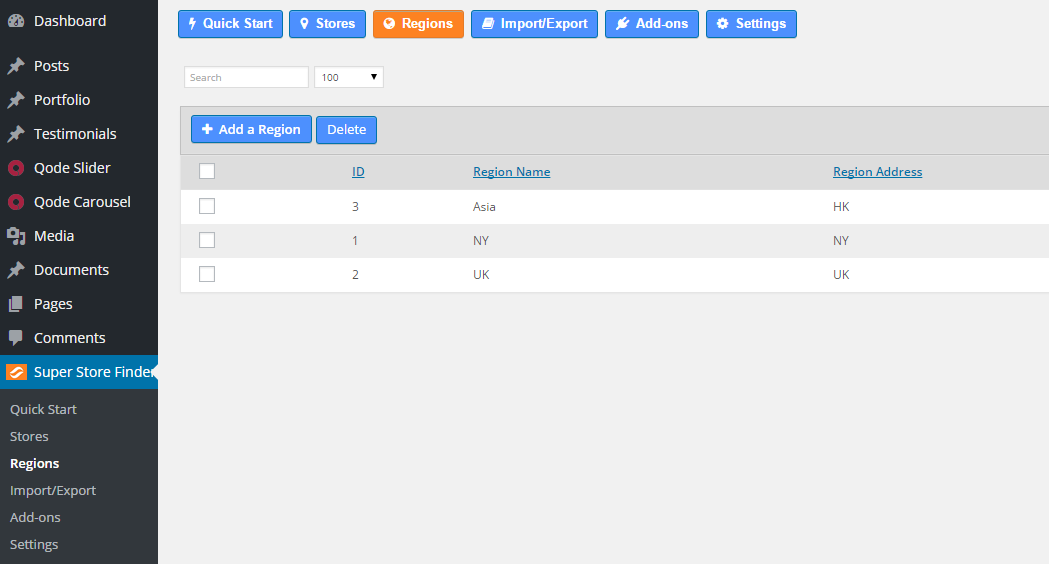
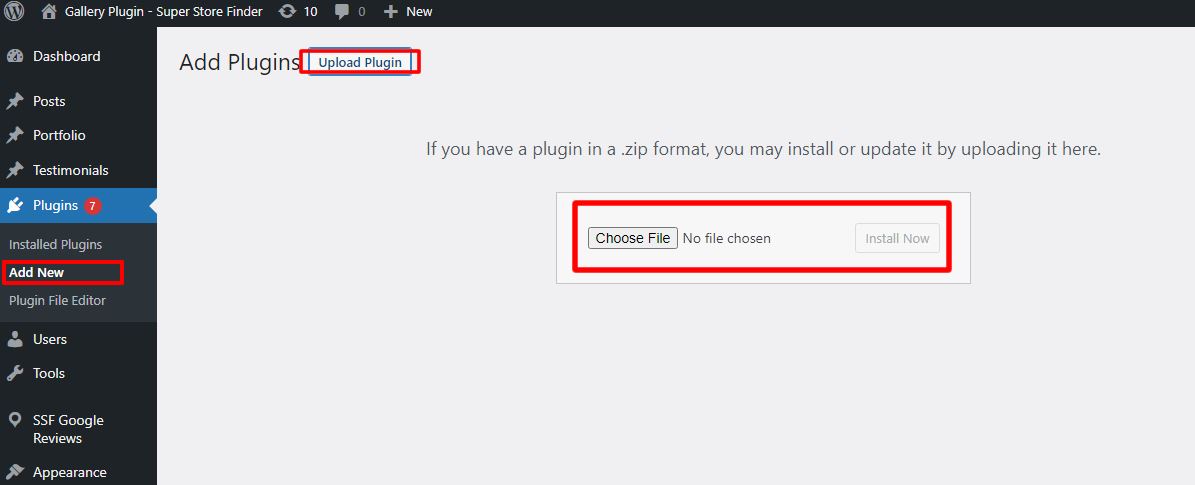
3. In order to use the add-ons, go to Super Store Finder > Add-ons


markerclusterer


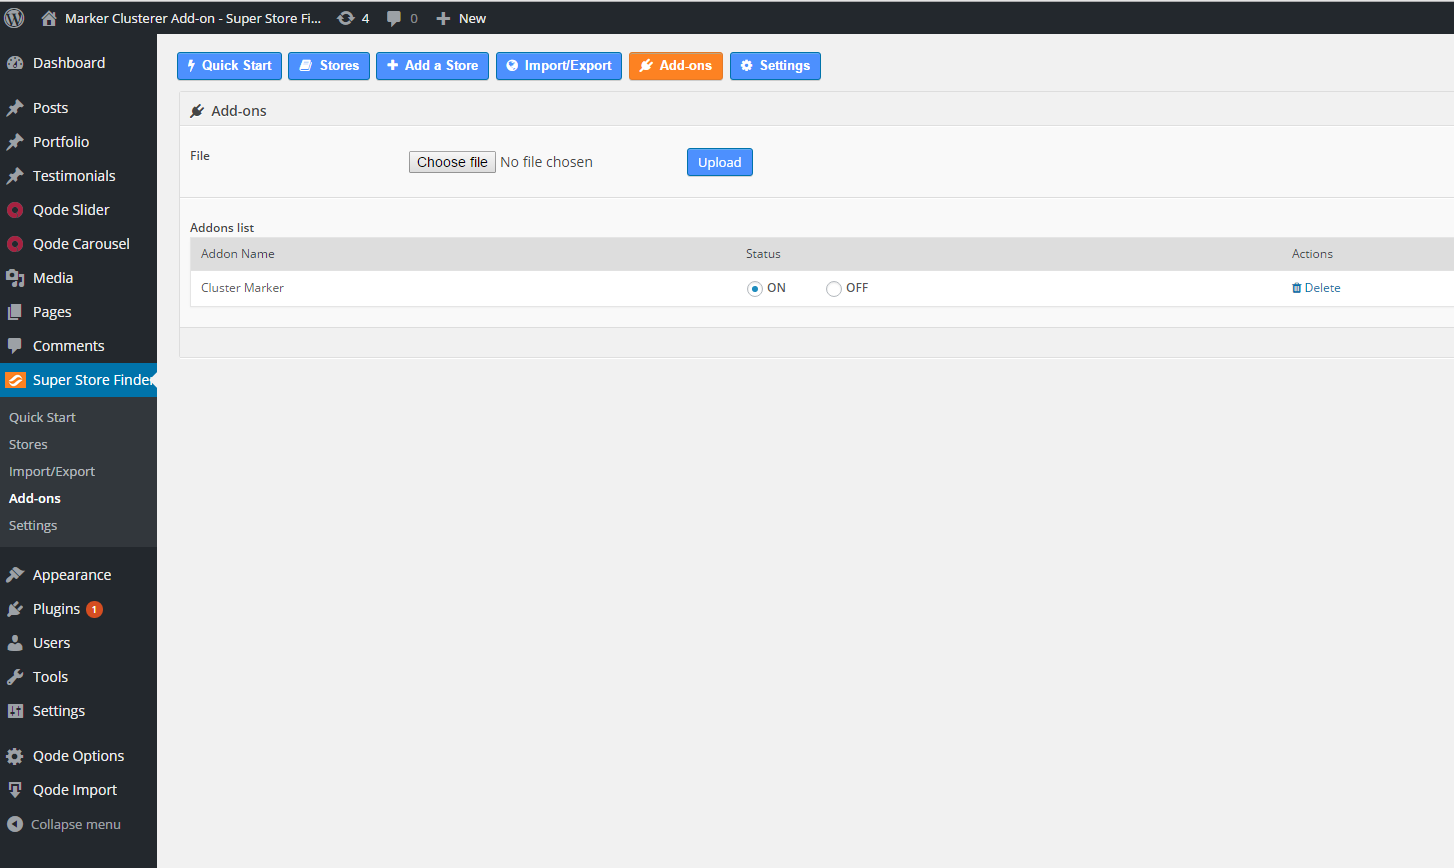
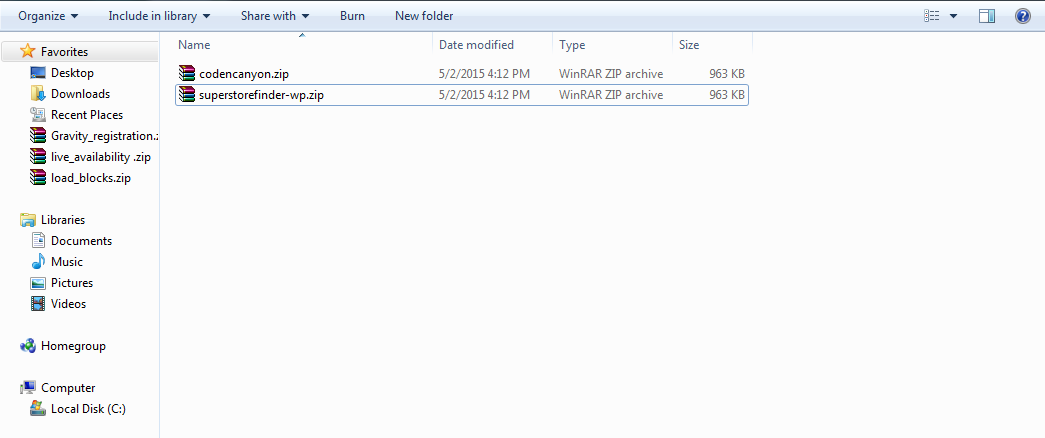
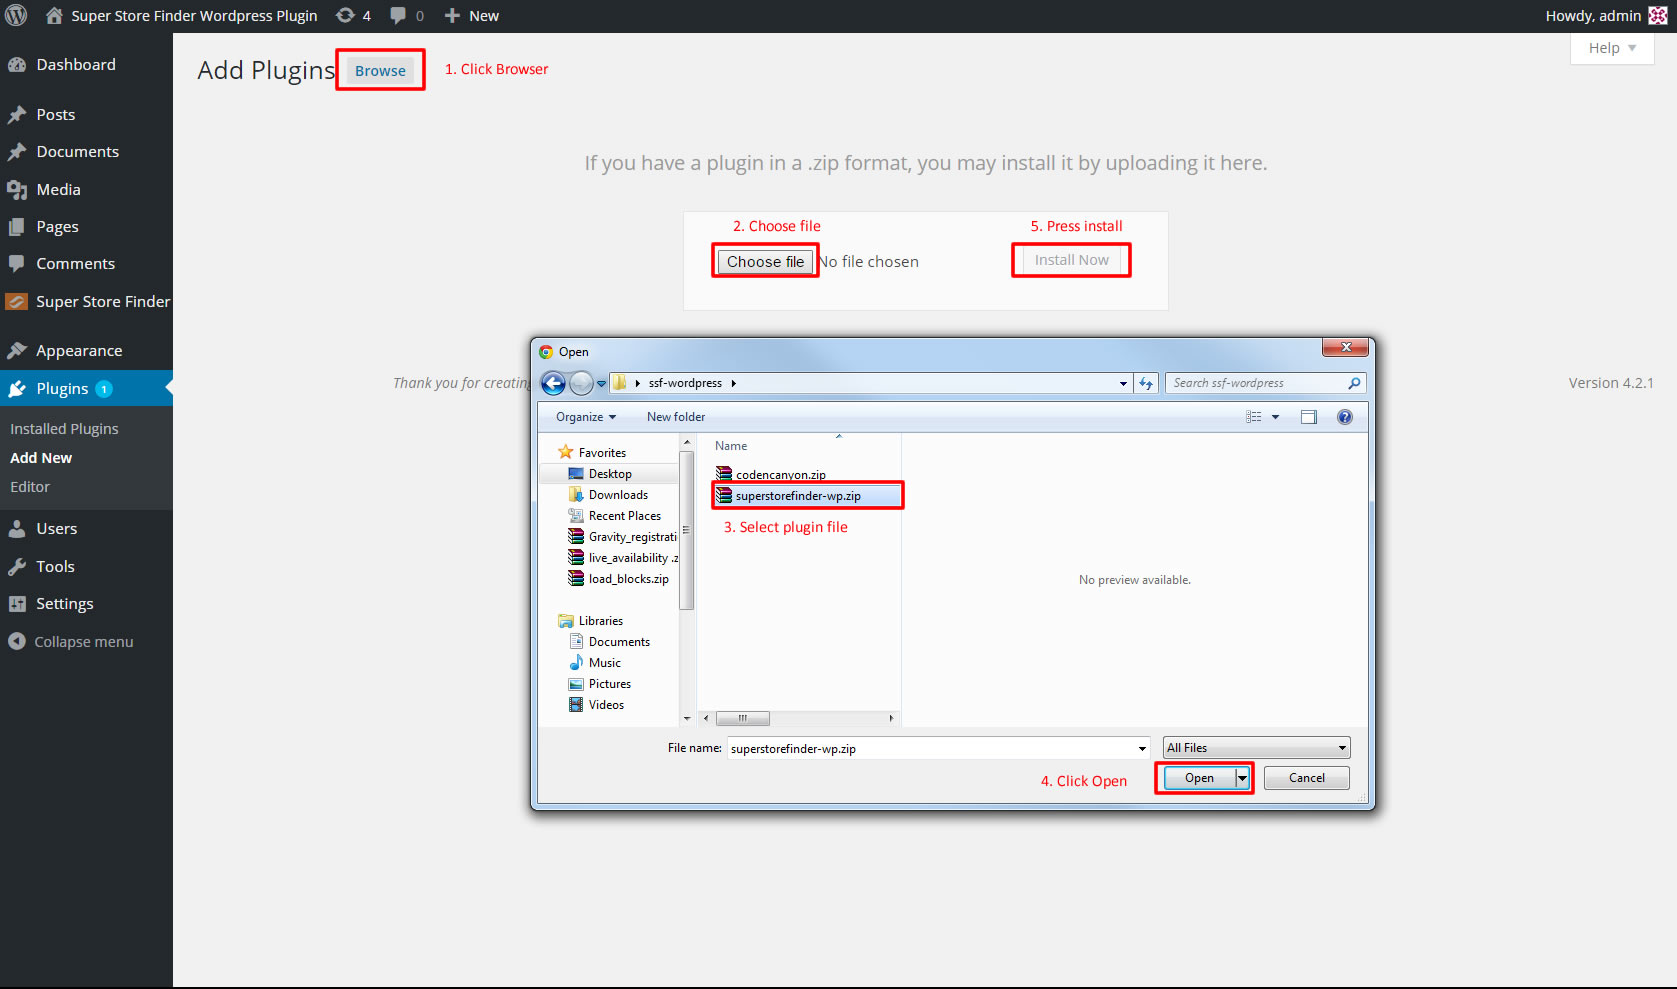
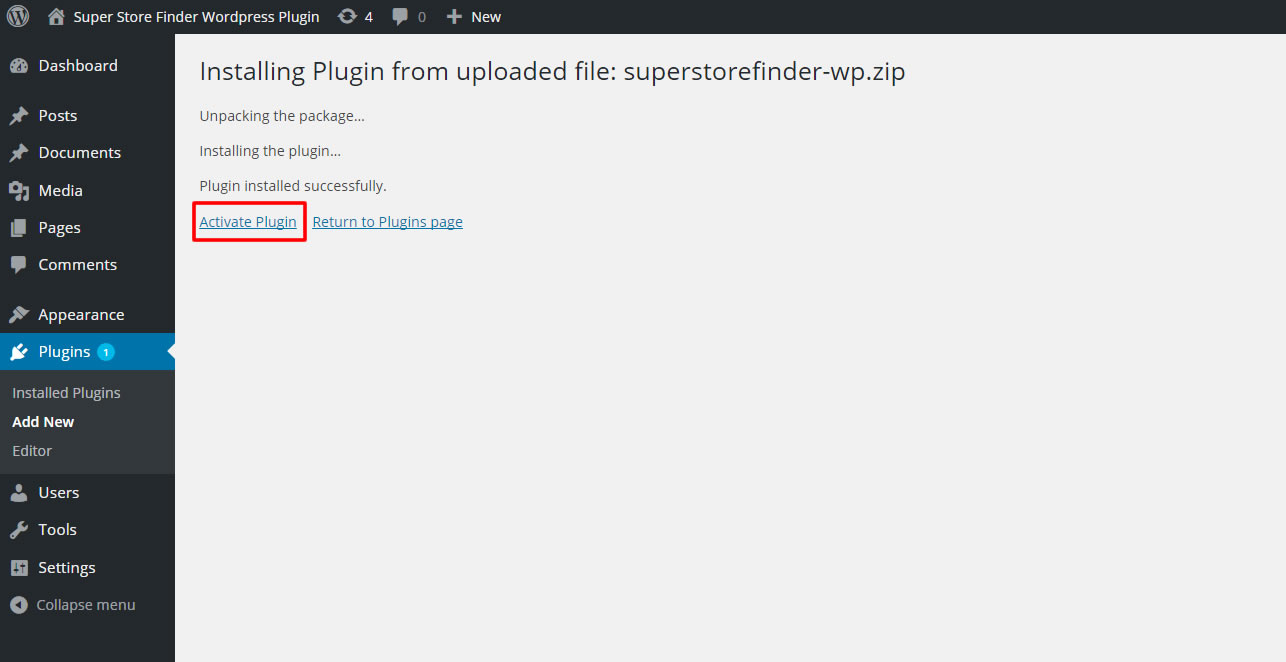
5. Browse and choose your add-on file, then click on Upload


6. Your add-on will be turned on by default, you can have the option to turn it off.


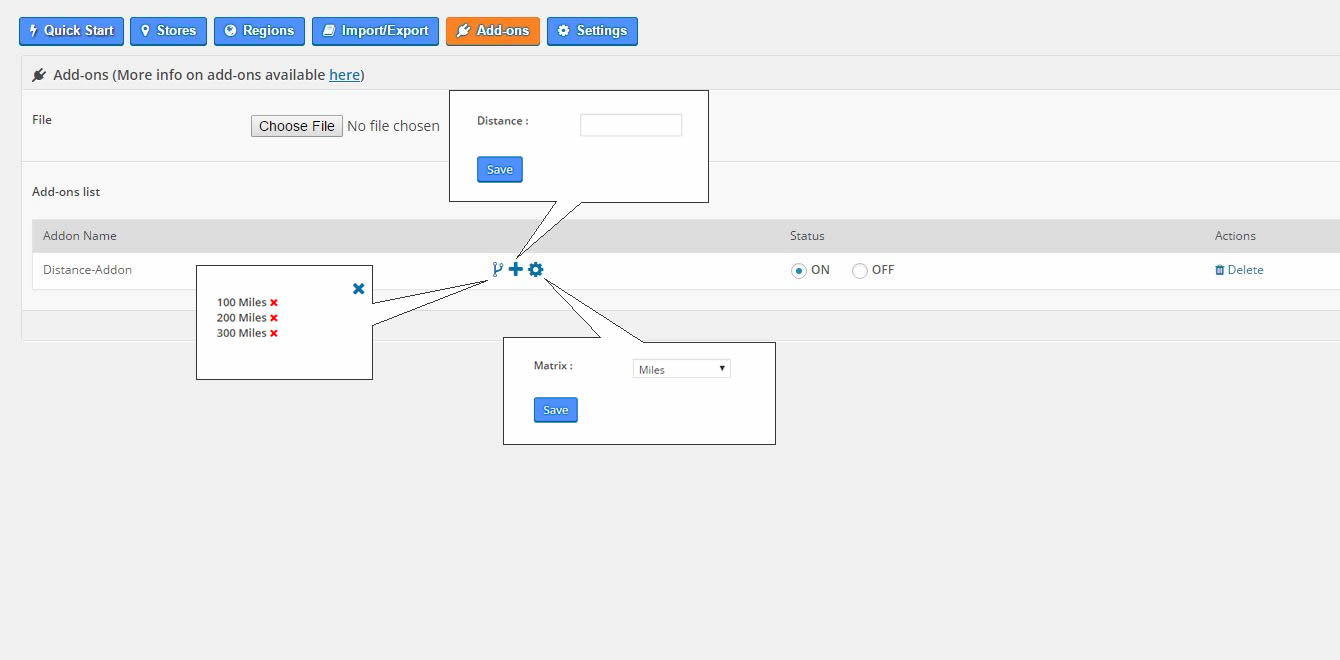
7. For distance radius addon, you can customized the settings as per screenshot below:

distanceaddon

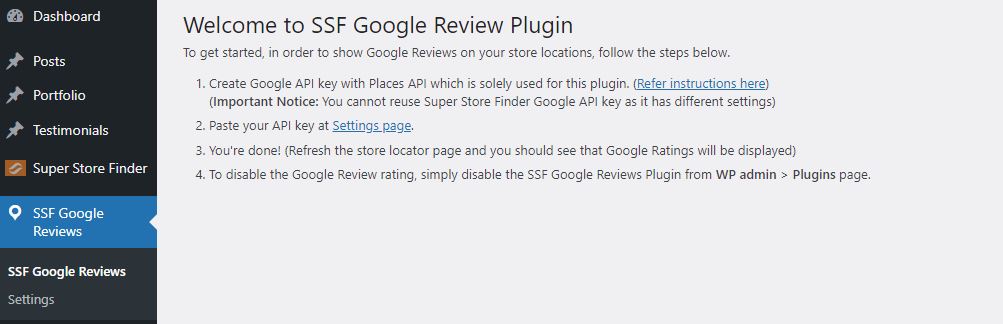
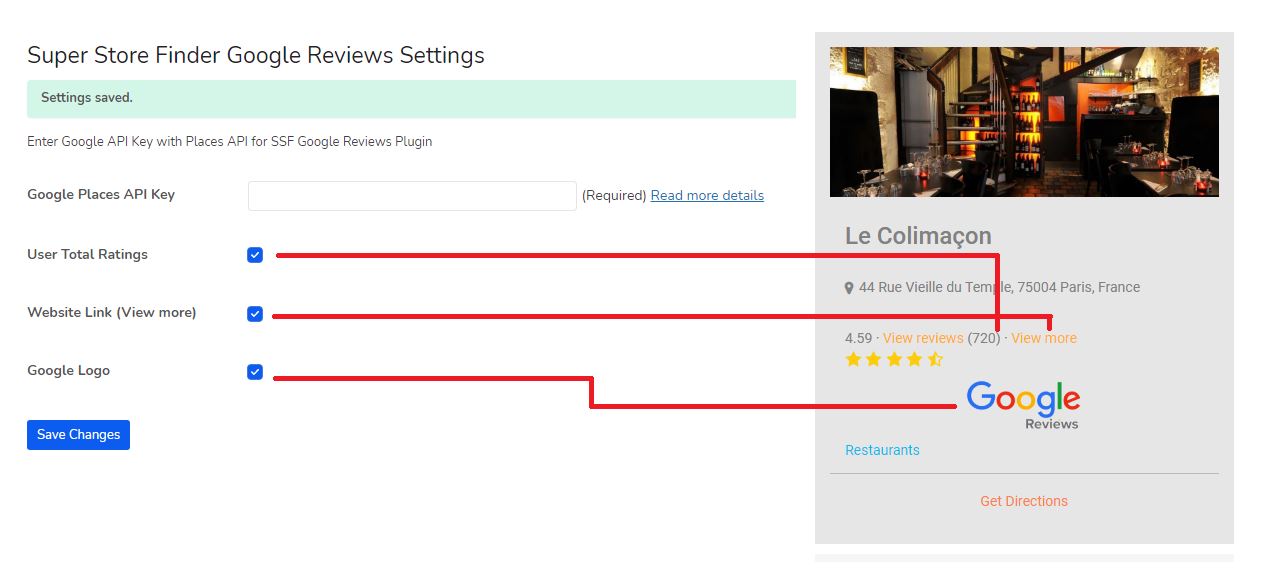
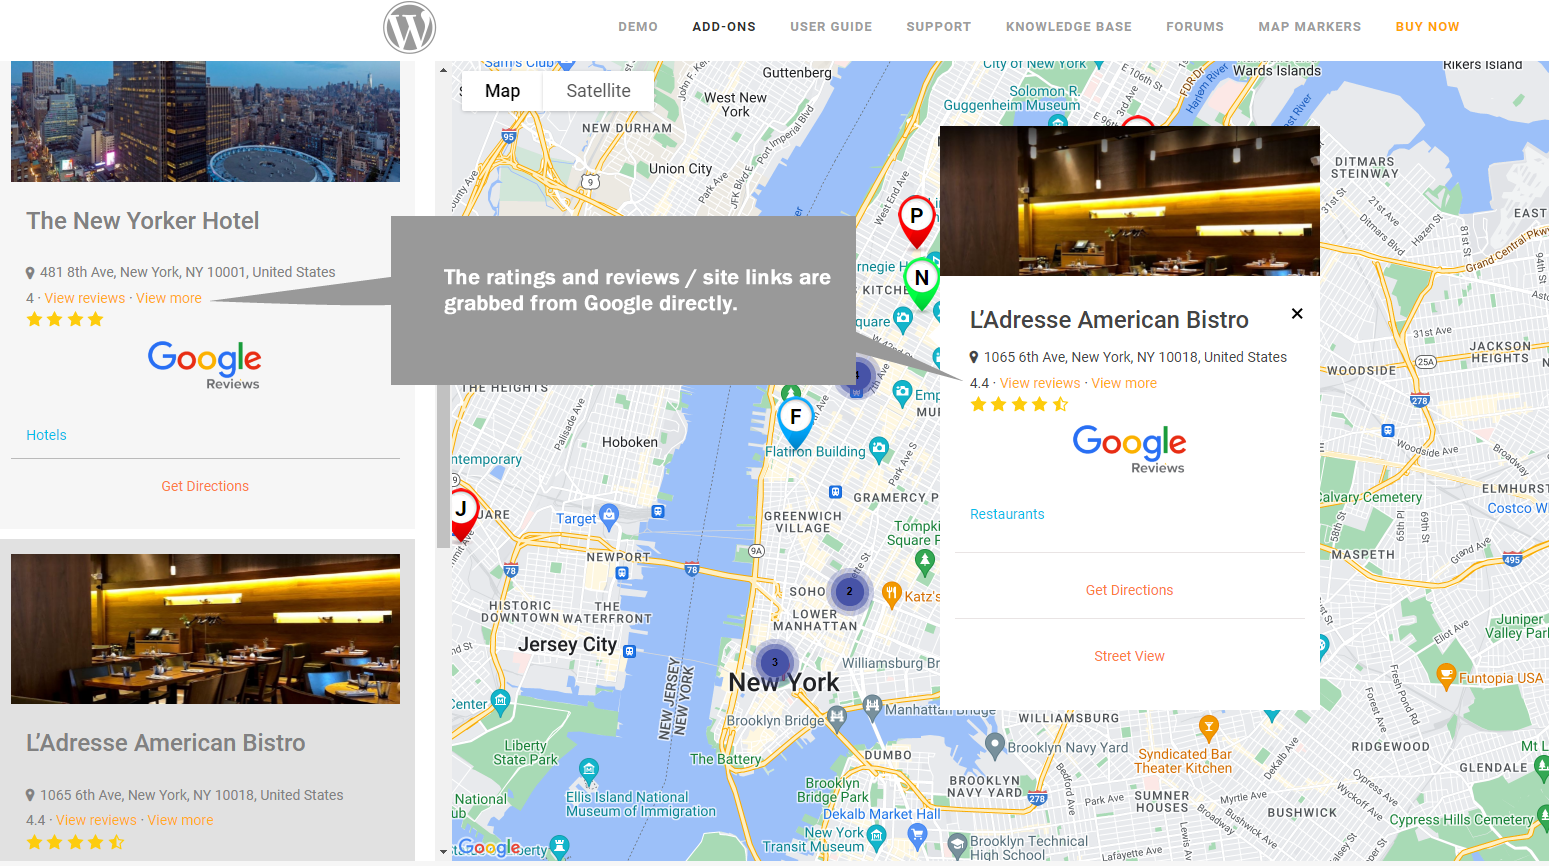
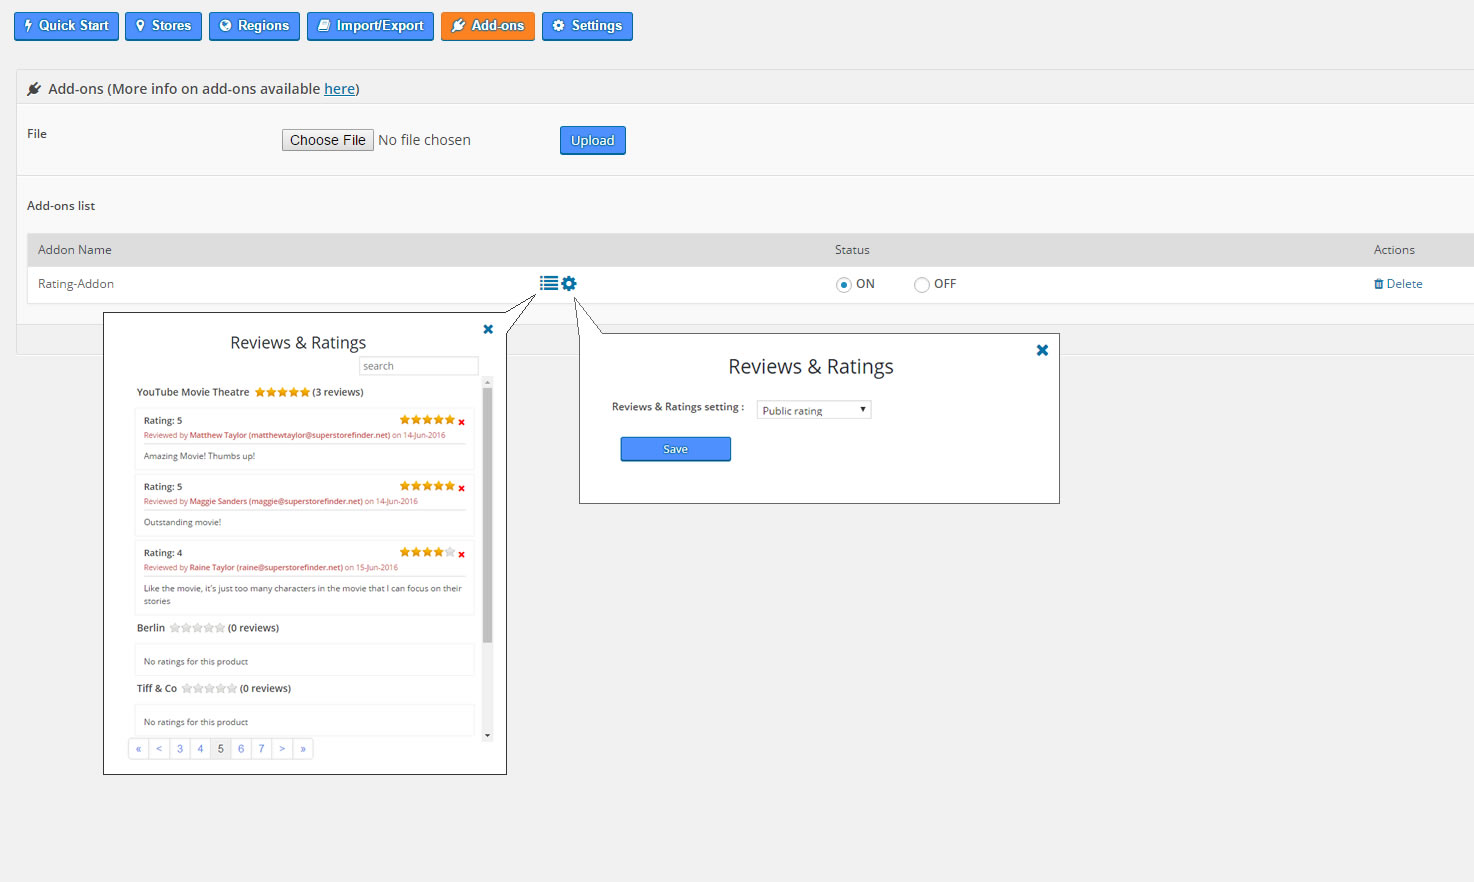
8. For social store locator – reviews & ratings add-on, you can manage user ratings and change settings (public ratings or WP members / users rating which requires sign in / sign up)

social-store-locator-user-guide

9. If you do not wish to use the add-on, you can delete it by click on the Delete icon.

Back To Top

Using SSF Google Reviews Add-on Plugin

1. At WordPress Admin, go to Plugins page

2. Browse and choose the add-on zip file ssf-google-reviews.zip and Upload Plugin

3. Activate Super Store Finder Google Reviews Addon plugin

4. Go to SSF Google Reviews Welcome Page to get started

5. Create Google API key with Places API which is solely used for this plugin. (Refer instructions here)
(Important Notice: You cannot reuse Super Store Finder Google API key as it has different settings)

6. Paste your API key at SSF Google Reviews > Settings page.

ssf-google-review-settings

* You can also set Miscellaneous settings such as the option to show or hide User Total Ratings, Website links, Google Logo, etc at the same settings page.

7. You’re done! (Refresh the store locator page and you should see that Google Ratings will be displayed)

8. To disable the Google Ratings, simply disable the SSF Google Reviews Plugin from WP admin > Plugins page.

Back To Top

Support

Support, Knowledge Base and Forums

We provide fast and reliable support, for inquiry, troubleshooting, customization and special requests, please send an email via the contact form at http://codecanyon.net/user/highwarden

Be sure to follow us on Envato for new releases and future products here.

For knowledge base and forums you can visit the following links:

You can also follow us on social media sites

Super Store Finder Facebook Super Store Finder Instagram Super Store Finder Twitter Super Store Finder YouTube Super Store Finder Pinterest


Back To Top