All Google Maps Platform applications that utilizes Geocoding require authentication using an API key, in the case of Import & Geocoding in Super Store Finder plugin, you will need to create this key. This key has different creation steps compared to How to Create Google API key, you can refer a detailed instructions on how to create Google Geocoding key as below.
1. Go to https://console.cloud.google.com/
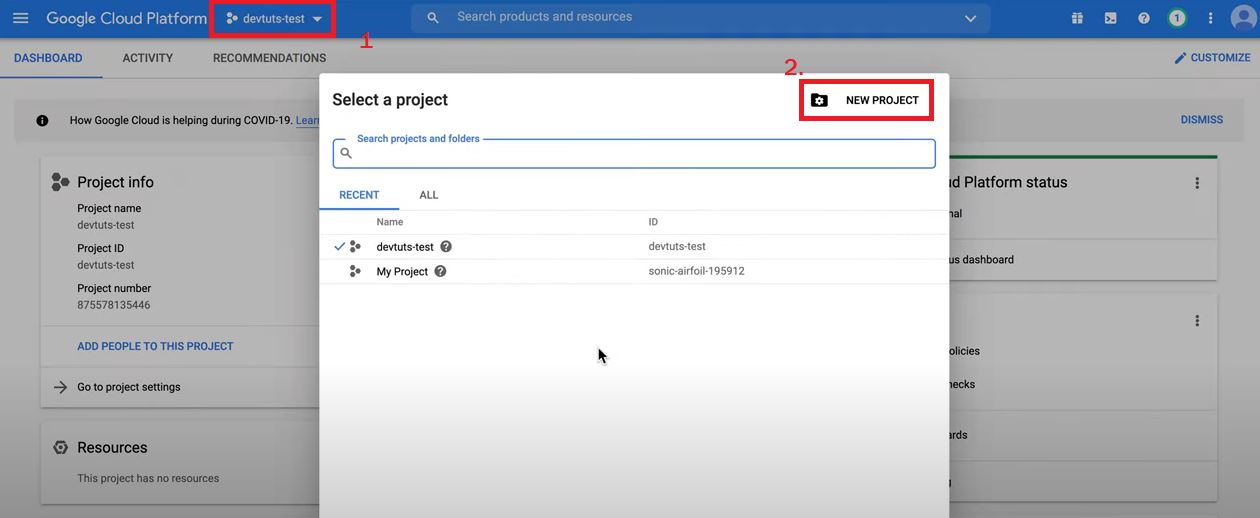
2. Click the Select a Project or one of your Projects on the top left of your screen and then click New Project.
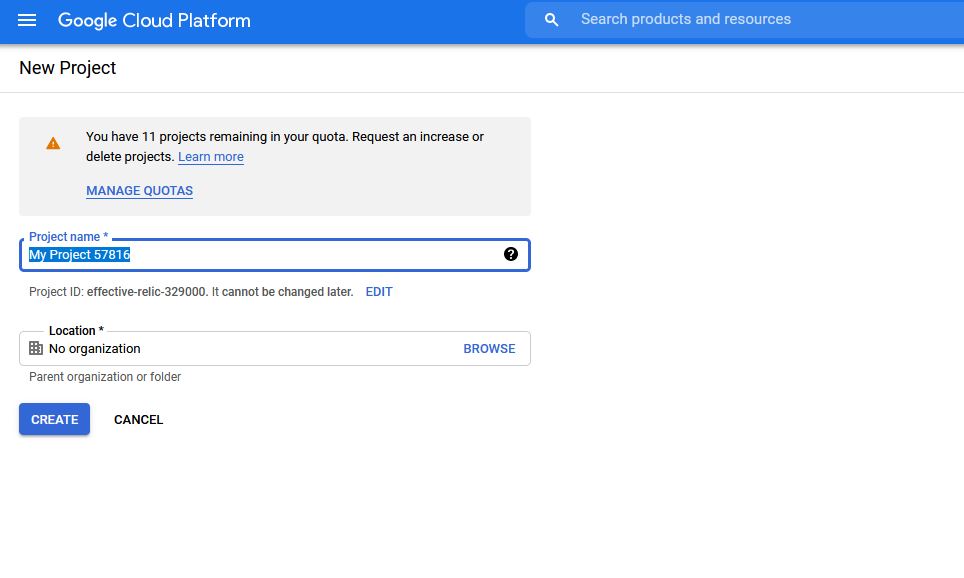
3. Enter your Project name and click on the Create button
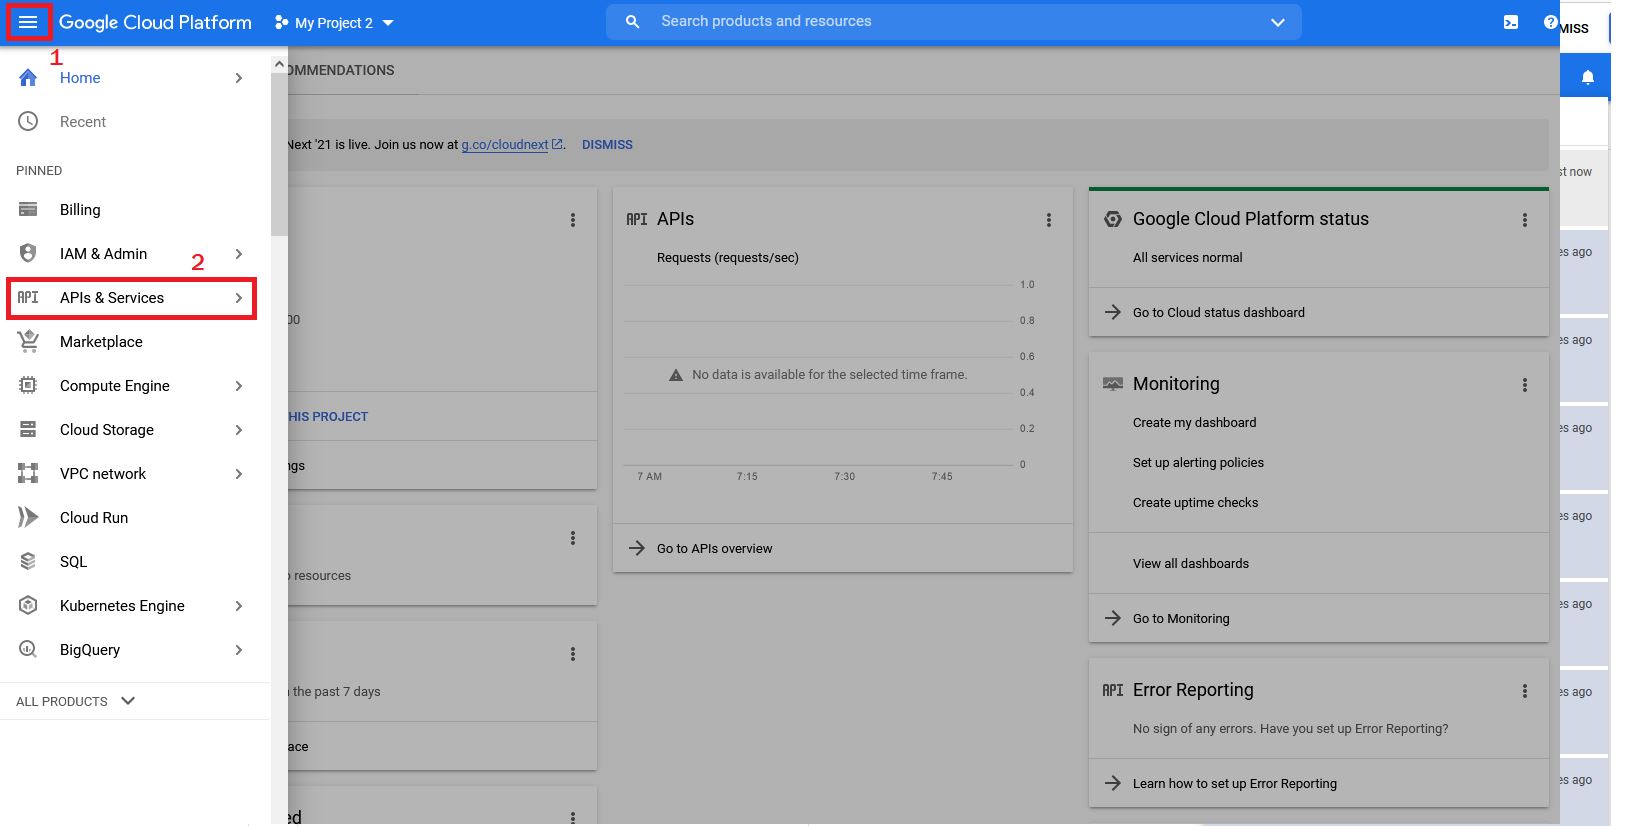
4. Click on the 3 lines menu (top left) and click on API & Services
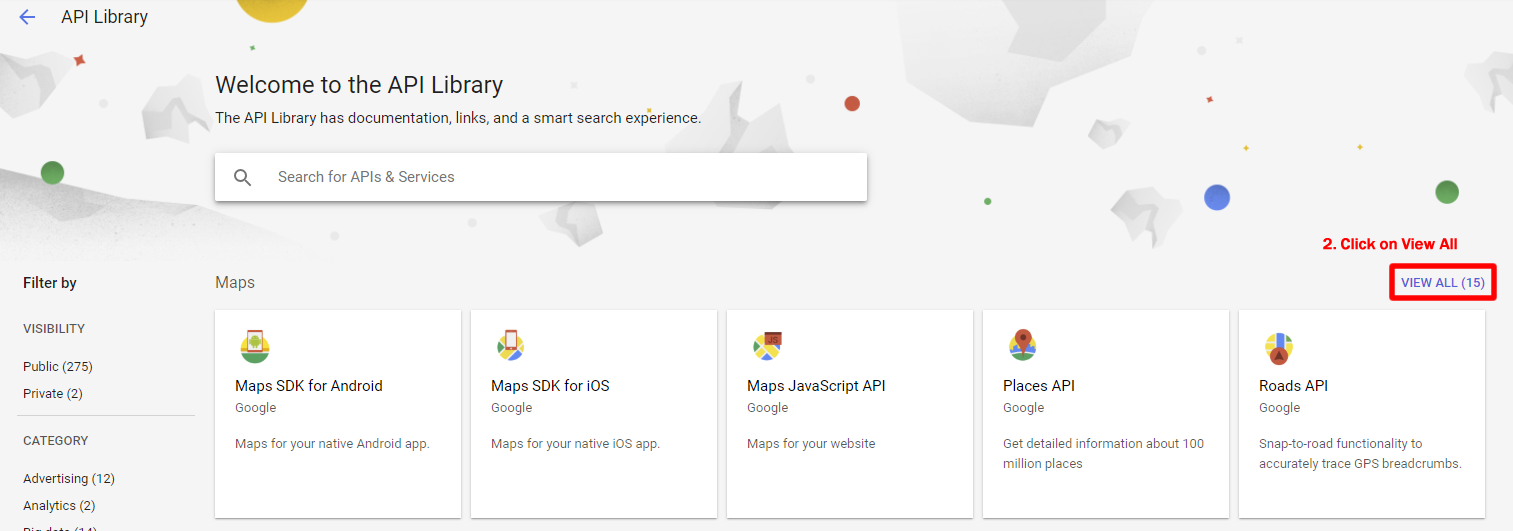
5. Click on the Library link
6. Click on View All
7. Enable GeoCoding API only (This is used for Import and Geocoding)
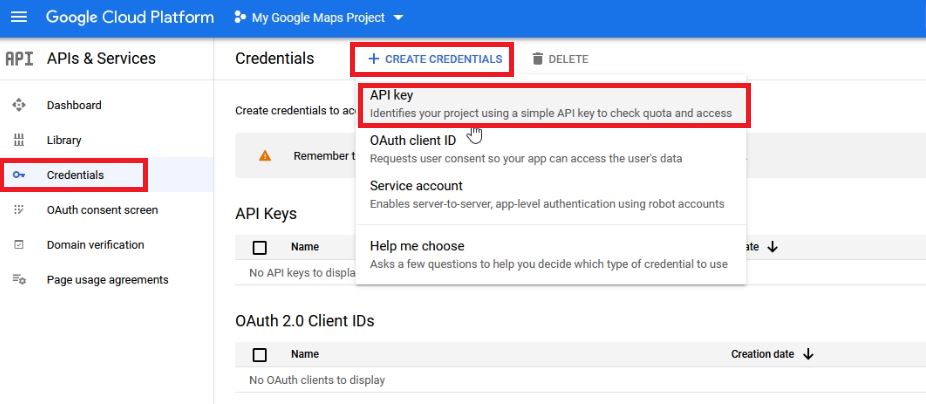
8. Once you’ve created your API key go to https://console.cloud.google.com/apis/dashboard and select your Project, then select Credentials (key icon) and click on the Create Credentials > API key
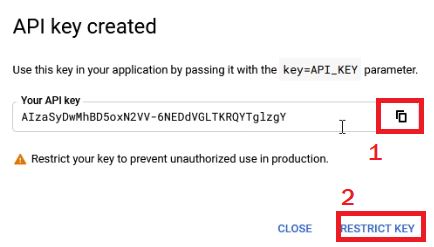
9. Copy your Google API key. Follow this instruction on How To Use Google API key in Super Store Finder applications then click on Restrict Key to Restrict your API key or Go to API & Services > Credentials > Edit your API key (pencil icon).
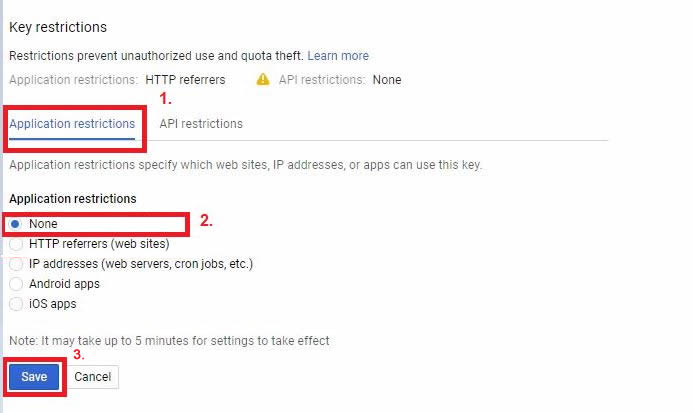
10. Under Application Restrictions, select None or if you have IP address you can use it, this is because based on the latest Google updates, geocoding will require a static server IP or without reference.
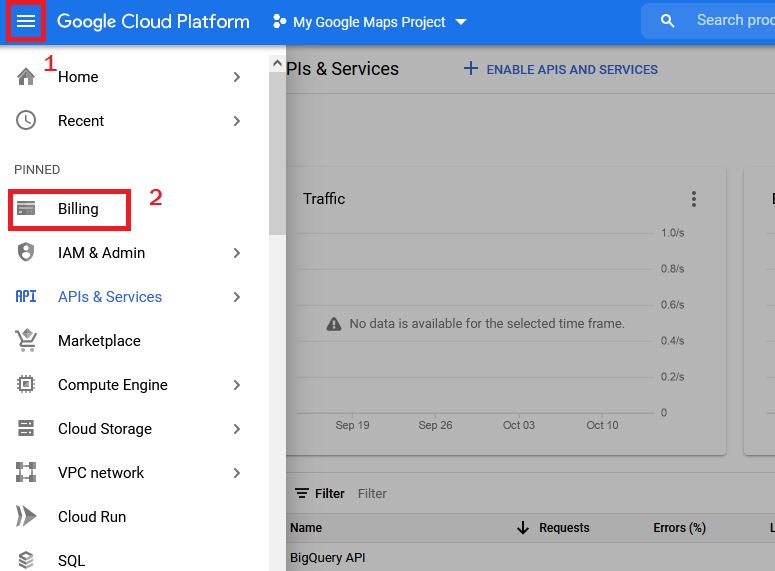
11. Enable Billing by choosing your account and clicking on the 3 lines menu (top left) and click Billing
12. Here you can choose to Link a Billing Account or Manage Billing Accounts
13. Enable your billing by clicking this link https://console.cloud.google.com/project/_/billing/enable
14. You can refer to this article on How to Use Google API key in Super Store Finder plugin.
* More details on Google API keys usage and limits available in this article here.
* Take note, that Google is providing 24/7 support which you can reach them here for further inquiries and support.
Users who have LIKED this post:


