First of all, before you start, you will need setup attributes and products for your e-commerce website, you can refer to WooCoomerce Comprehensive Installation and Setting up Guide here.
This part of the user guide will guide you on how to create your attributes (i.e colors, image, labels)
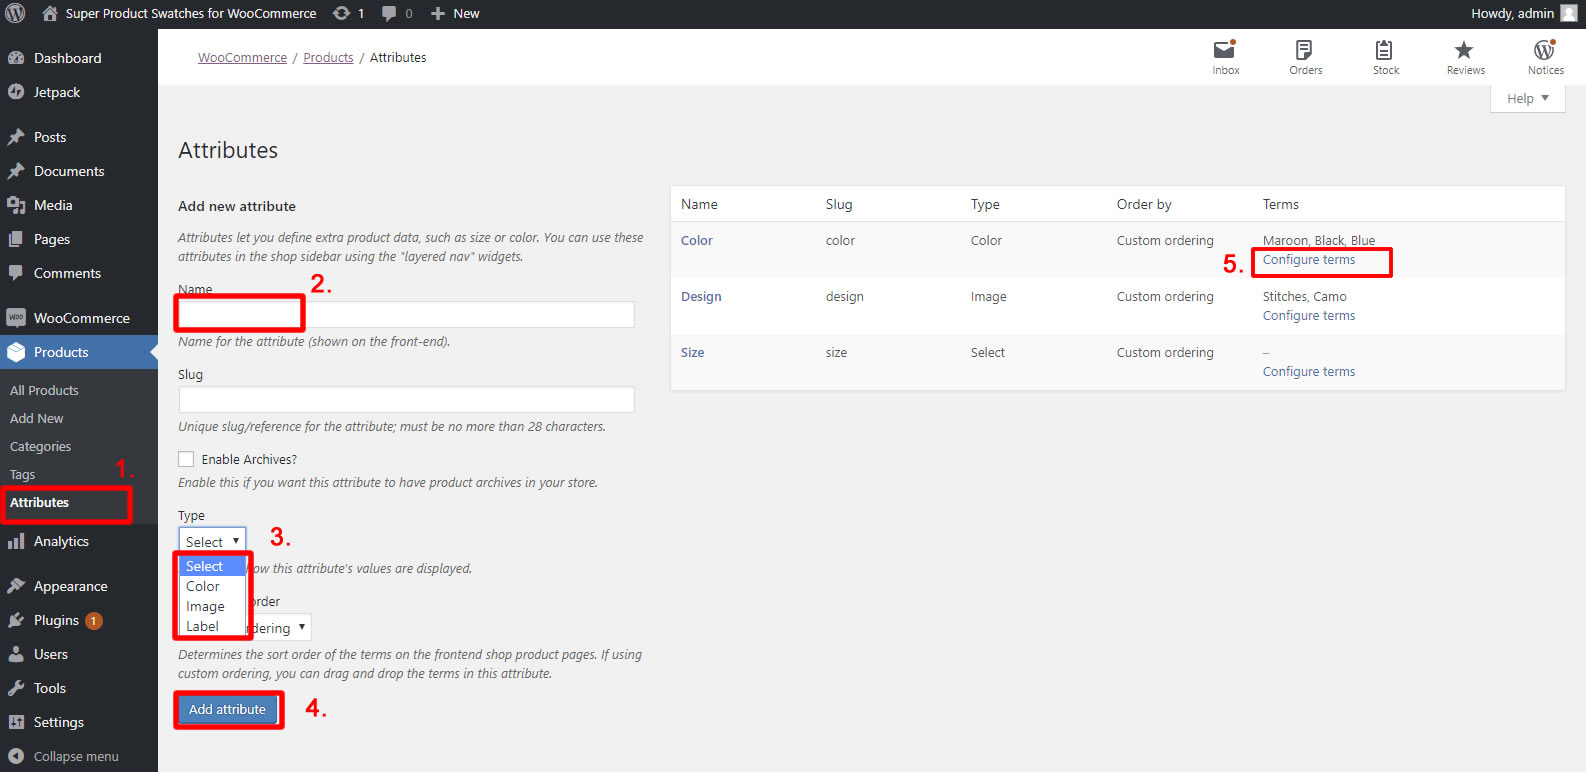
1. Click on Products > Attributes
2. Enter your attribute Name (i.e Color)
3. Choose the Type of attributes (if you choose color, you can choose color from color palette, if you choose image, you’ll be able to upload the texture/design image of a particular product variation).
4. Once done, click on Add Attribute.
5. You will see that your new Color Attribute will appear on the right table list, click on Configure Terms to start configuring individual colors for your products.
6. Once you’ve clicked Configure Terms, you can manage your colors here, to add a new color, enter the color Name and details
7. Select the Color from the color pallete
8. Click on the Add new color button
9. Your new color will appear on the table list to the right
10. You can edit/delete any colors by hovering on the color name and click Edit/Delete.
Important Notice: You can add colors on-the-go while adding products in WooCommerce, refer to this user guide section for more info.
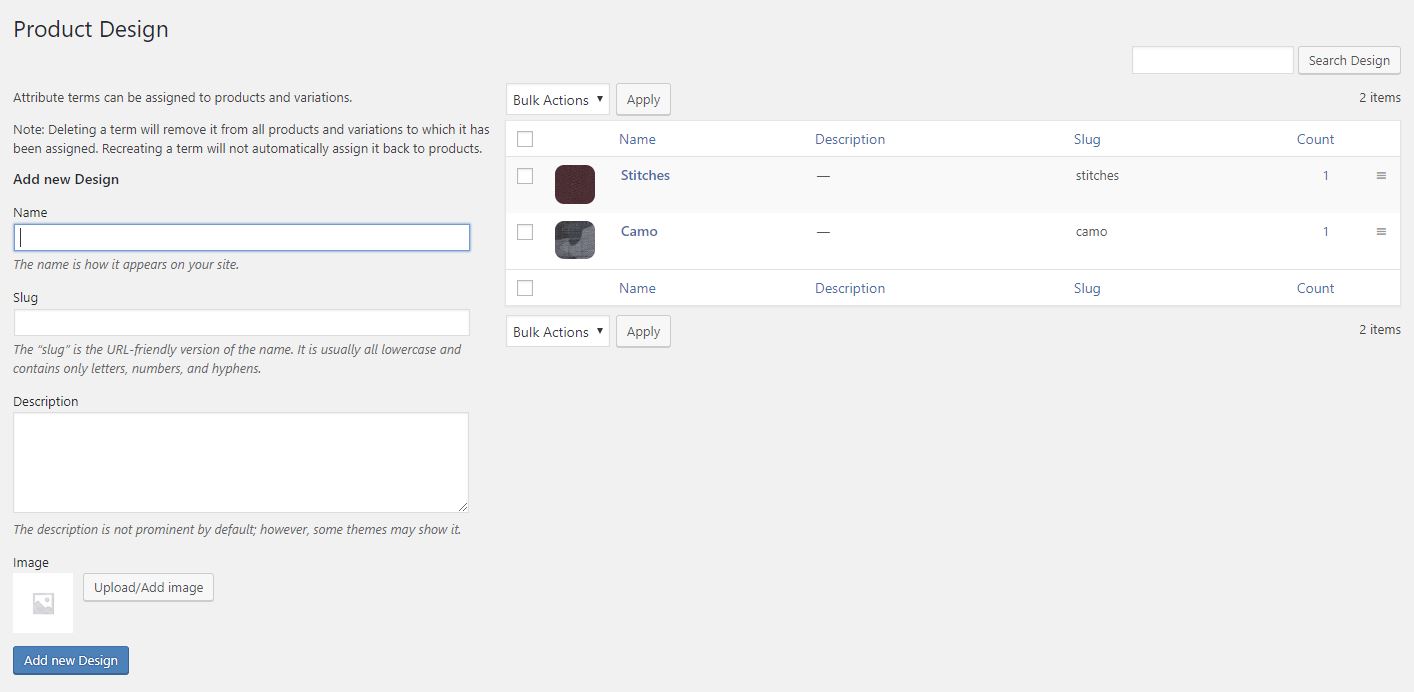
11. For Image Attribute, when creating an attribute in step 3, choose Image, and you will be able to upload Images for your Product Variation as screenshot below
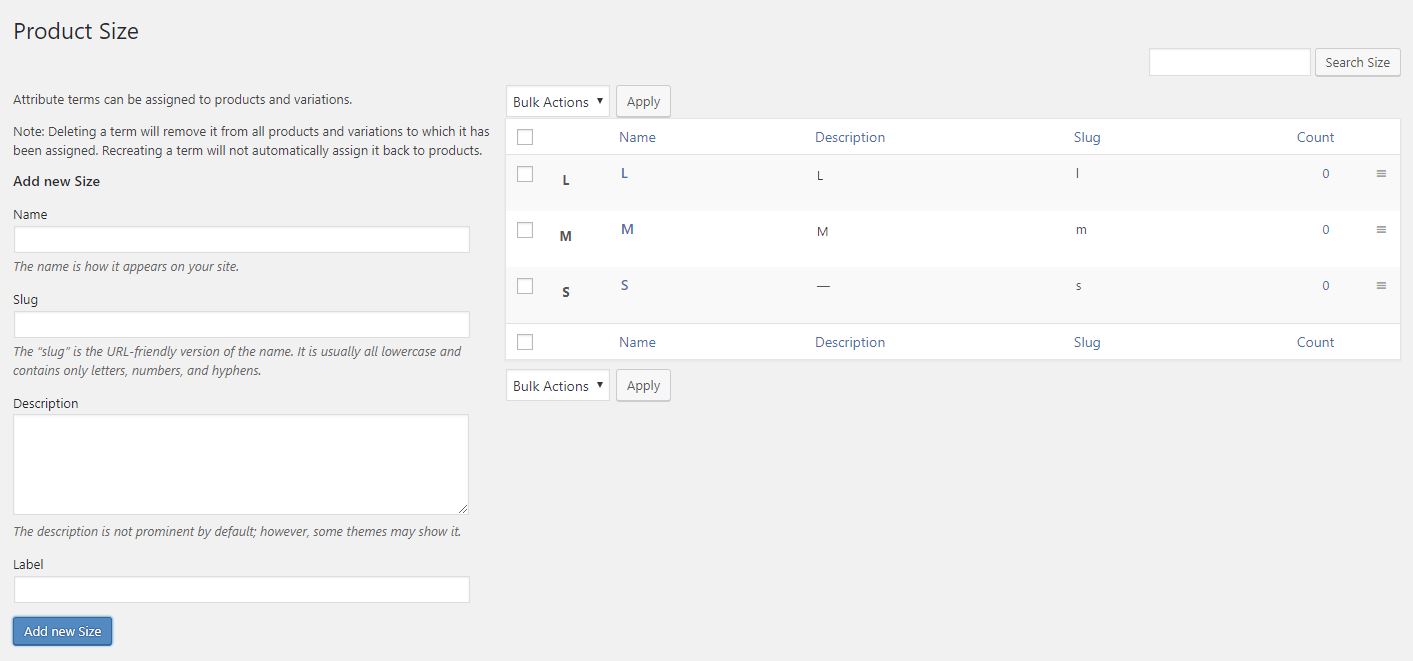
12. For Label Attribute, when creating an attribute in step 3, choose Label, and you will be able to enter label for your Product Variation as screenshot below


